Prerequisites
- Admin access to an Okta account
(For example:https://dev-1234567-admin.okta.com/admin) - Access to a StarTree environment.
- Obtain the sign-in and sign-out redirect URLs from StarTree.
Steps
- Sign in to Okta as an admin.
- Click on Applications in the left navigation menu.
-
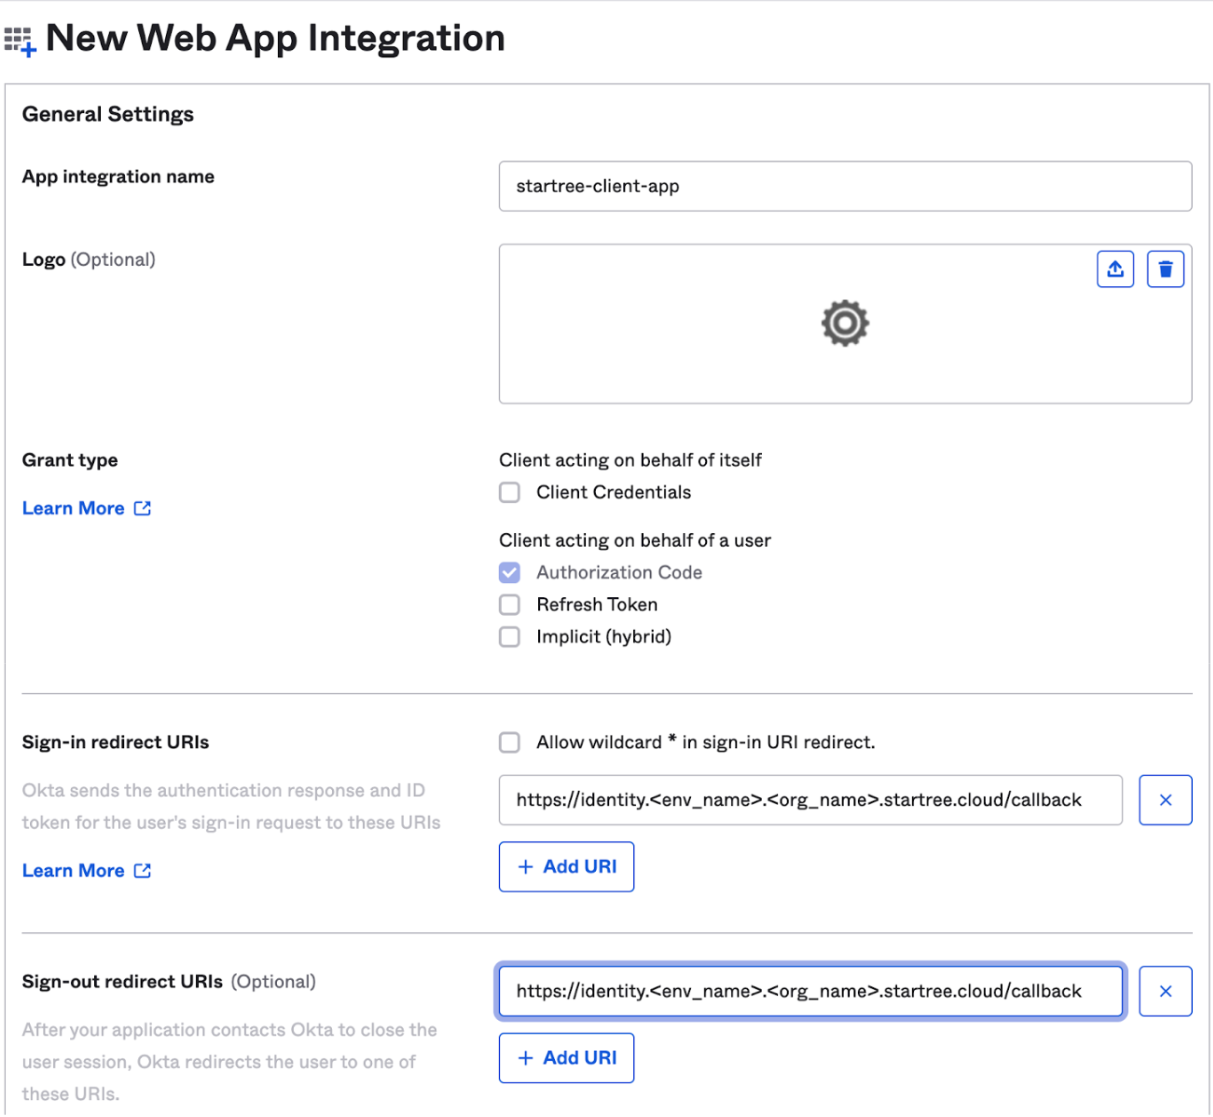
Create a new Application:
a. Click Create App Integration.
b. Select OIDC - OpenID Connect as the sign-in method.
c. Select Web Application as the application type.
d. Click Next.
e. Enter the App integration name.
f. Fill in the sign-in and sign-out redirect URLs provided to you by StarTree.
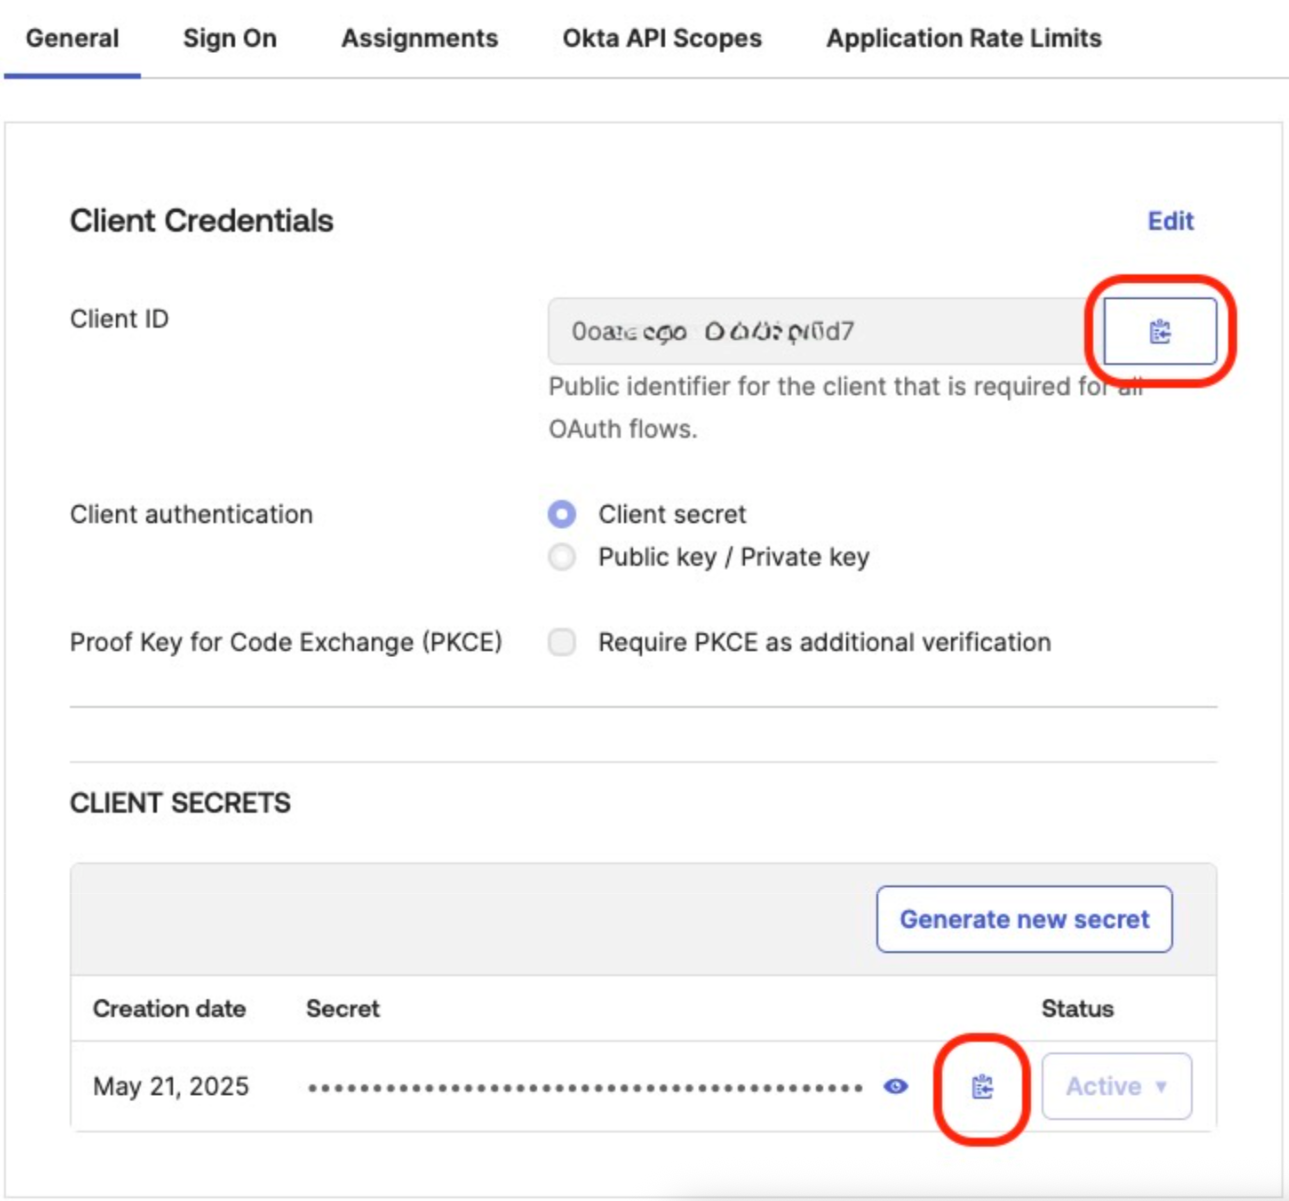
- Obtain the Client ID and Client Secret. You will need to provide these to StarTree.
-
Configure the groups claim:
a. Click on the Sign-on tab.
b. Click Edit in the OpenID Connect ID Token section.
c. Click the Issuer dropdown and select Okta URL.
d. Click Save.
e. Copy the Issuer URL (example:https://dev-1234567.okta.com) . You will need to provide it to StarTree.
f. If groups are managed in Okta:
To have Okta return the list of all groups that a signed-in user belongs to, change the Groups claim filter to Matches regex and set the expression as needed (use.*to always include all groups that a user belongs to).
Set the “Groups claim type” to “Expression”, and enter the appropriate expression (e.g. Groups.startsWith(“active_directory”,”my-group-name”,100)).
For more info, refer to the Okta Help Center.
-
[Optional] If you are using Okta’s Custom Authorization Server, then you will need to add the groups claim to the ID token.
a. Navigate to the Authorization Servers section.
b. Open the relevant custom authorization server.
c. Click on the Claims tab.
d. Under the ID claim type, enter the following claim name:https://schemas.startree.ai/identity/claims/groups, and set the value as needed.

- To complete the configuration of Okta IdP in StarTree, provide the following details that you obtained in the previous steps:
- App integration name.
- Client ID and Client Secret.
- Issuer URL.
Granting User and Group Access to StarTree
- You can assign users and groups directly to the application by clicking the Assignments tab.
- Alternatively, to create new groups or manage user and application assignments within a group, go to Directory > Groups in the left navigation menu. You may also need to grant your app permission to manage and read groups:
- In your app, click on the Okta API Scopes tab.
- Find the relevant groups permission and click Grant.