Column operations
Adding a column
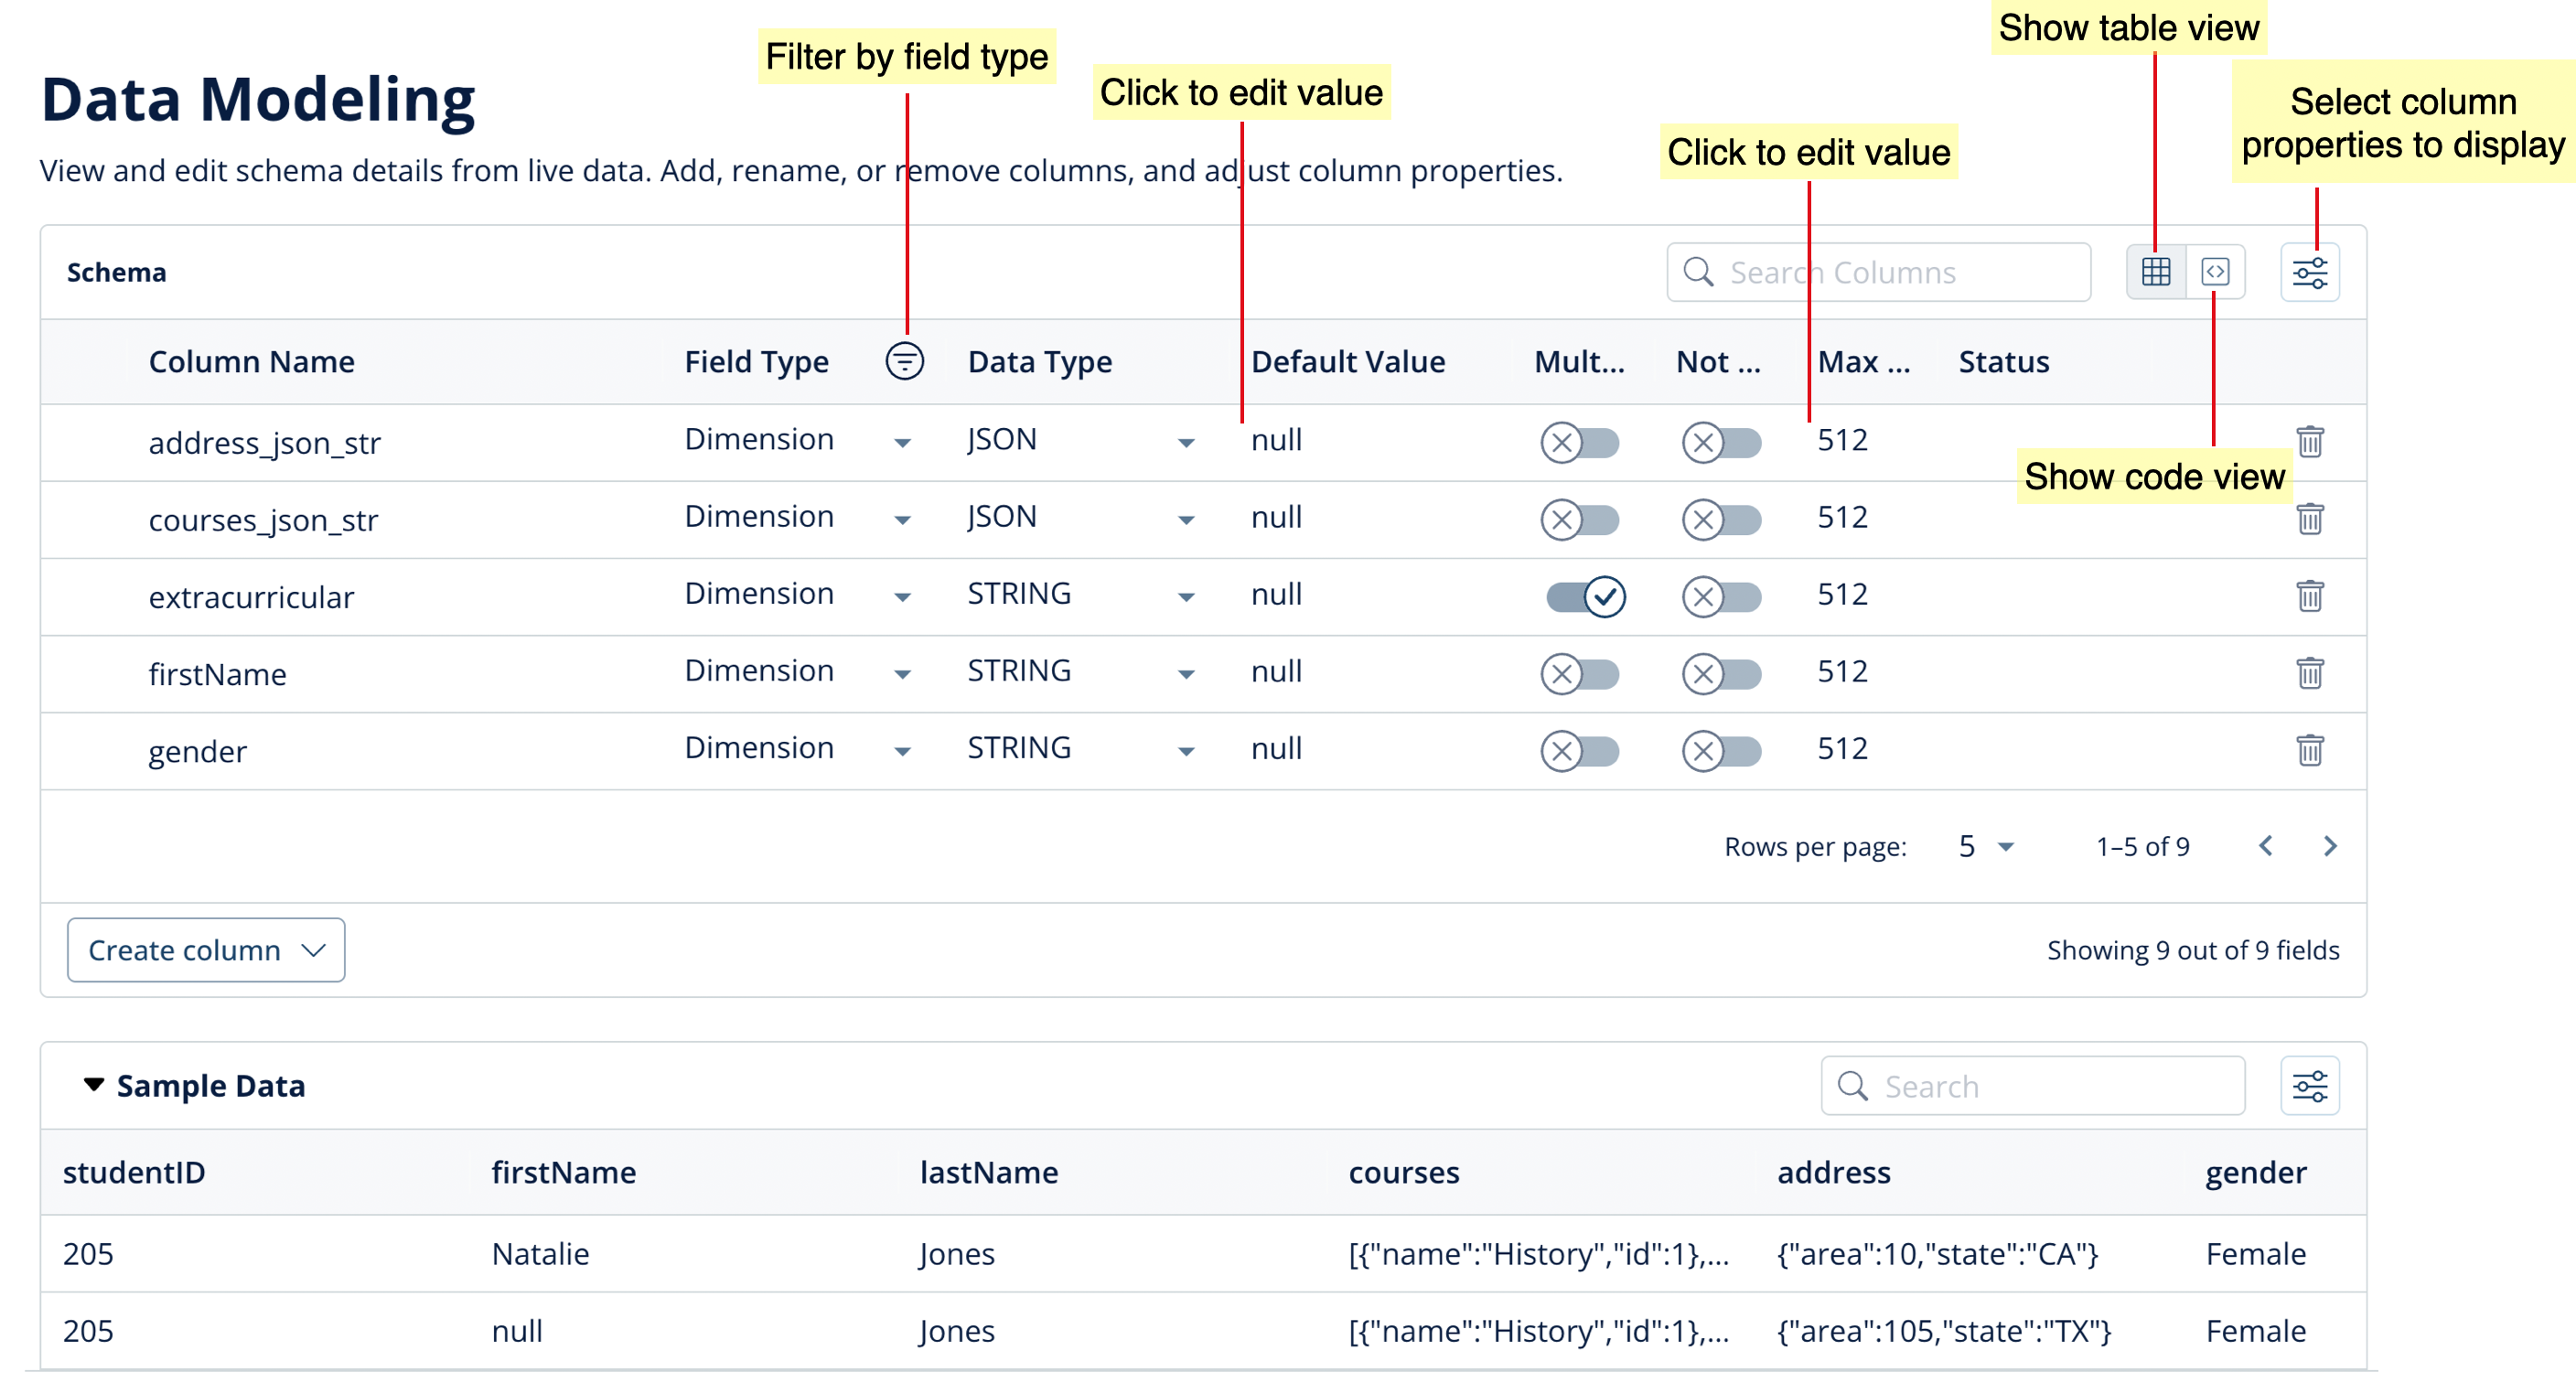
- Click Create column.
- Select the type: Dimension, Metric, or Datetime.
- Specify the New Column Name.
- Select a Data Type from the drop-down list.
- Specify the Max Length.
- Enter a Default Value.
- For Dimension columns: To allow for multiple values, click the Multi Value toggle button.
- For Datetime columns: Select the Datetime Format and specify the Datetime Format Value.
- Specify the Transformation function to be applied when deriving the new column.
- Click Fetch sample data to check if the data returned is as expected.
- Click Create column.
Customizing a column
You can customize columns by changing any of the column properties.- To change the Field Type or Data Type, select from the drop-down lists.
- To change the Default Value or Max Length, click on the value to update it.
- To enable multiple values or to specify a mandatory column, click the toggle buttons for Multi Value and Not Null.
Deleting a column
To remove a column from the schema, click the ‘trash’ icon alongside the row for that column.Next Steps
For more information and examples for data modeling operations, see Data Modeling Examples. After completing Data Modeling, proceed to Additional Configurations.