> ## Documentation Index
> Fetch the complete documentation index at: https://docs.startree.ai/llms.txt
> Use this file to discover all available pages before exploring further.
# How to Use the Alert Creation UI
The alert creation UI is where you will create new alerts and there are 2 modes: `Simple` and `Advanced`.
* The `Simple` mode will prompt you for the different parts of the alert configuration and build the [configuration](/thirdeye/alert-configuration) JSON.
* You can see the current status of the JSON in `Advanced` mode or switch to that mode to paste your own configuration.
## How to access the alert creation UI
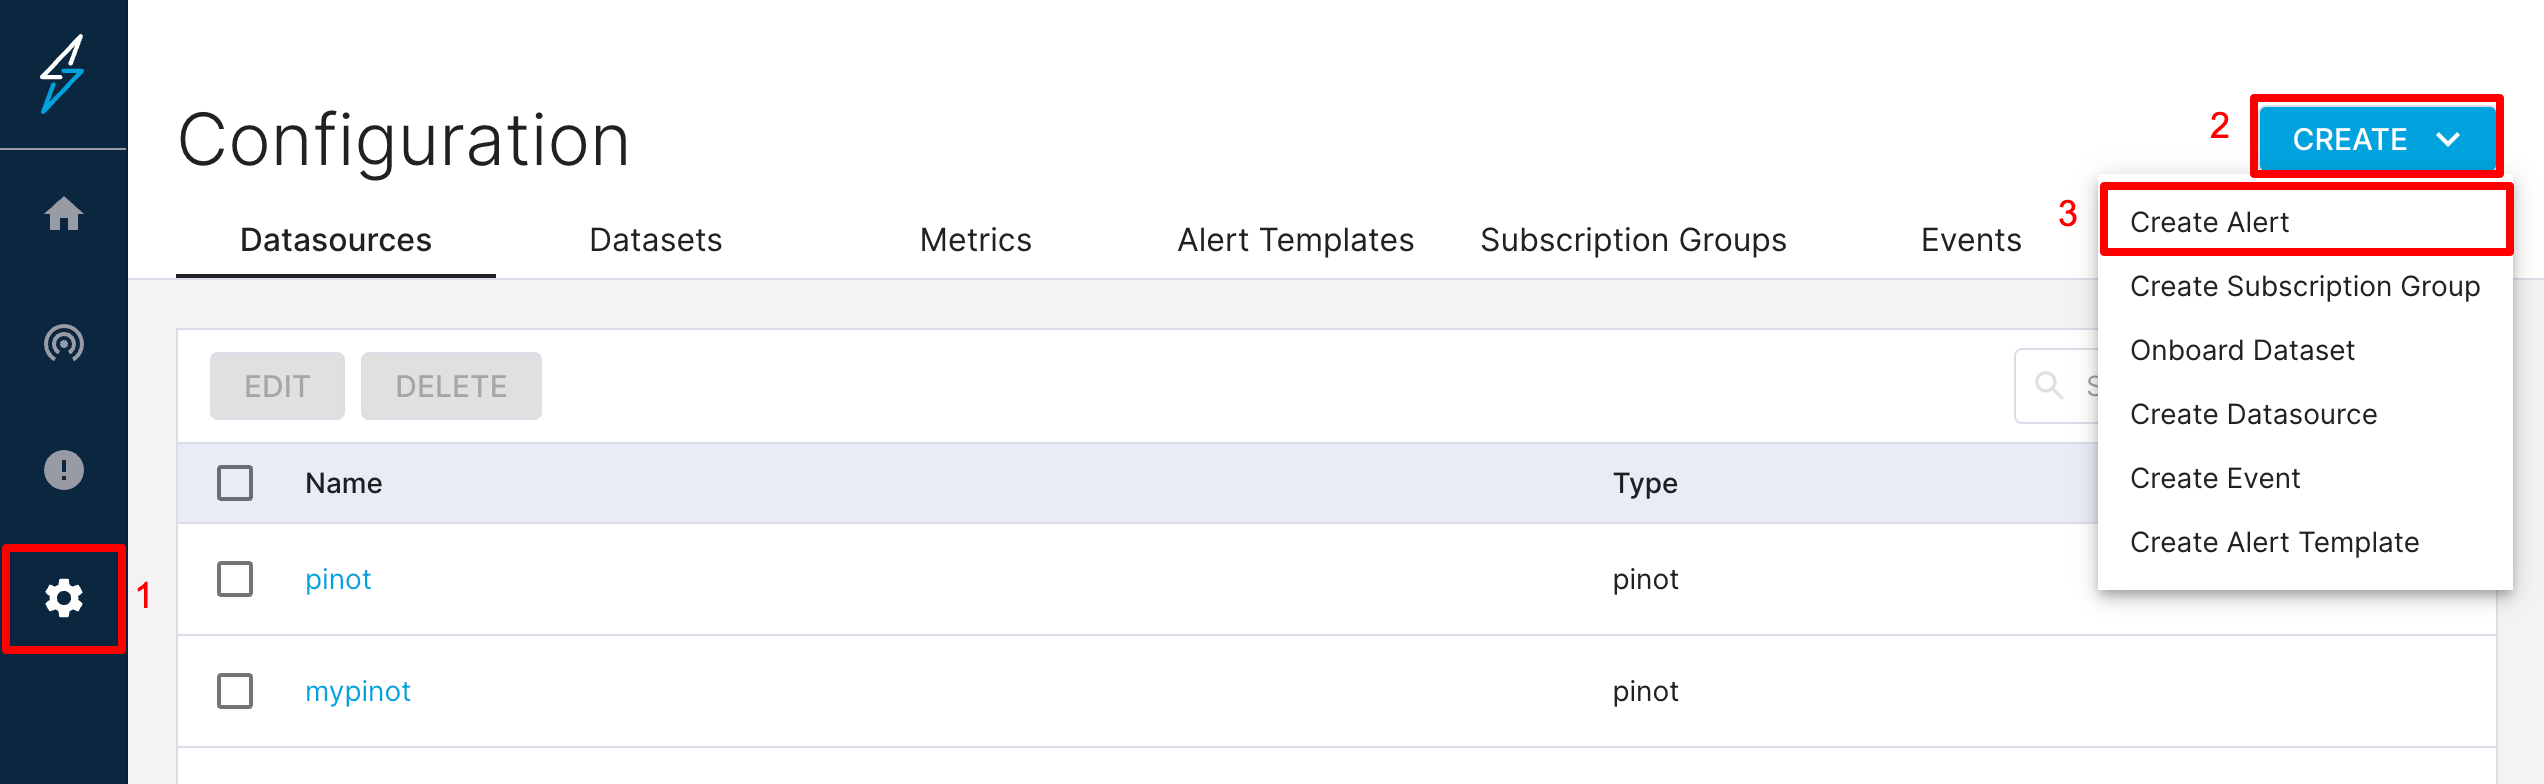
1. Browse to the **Configuration** page.
2. Click **Create**.
3. Click the **Create Alert** menu item.
This will take you to the alert creation UI, defaulting to `Advanced` mode.
## Simple Mode
You can switch to simple mode in the top right section of the page where there is a switch for the 2 modes.
### The Sections
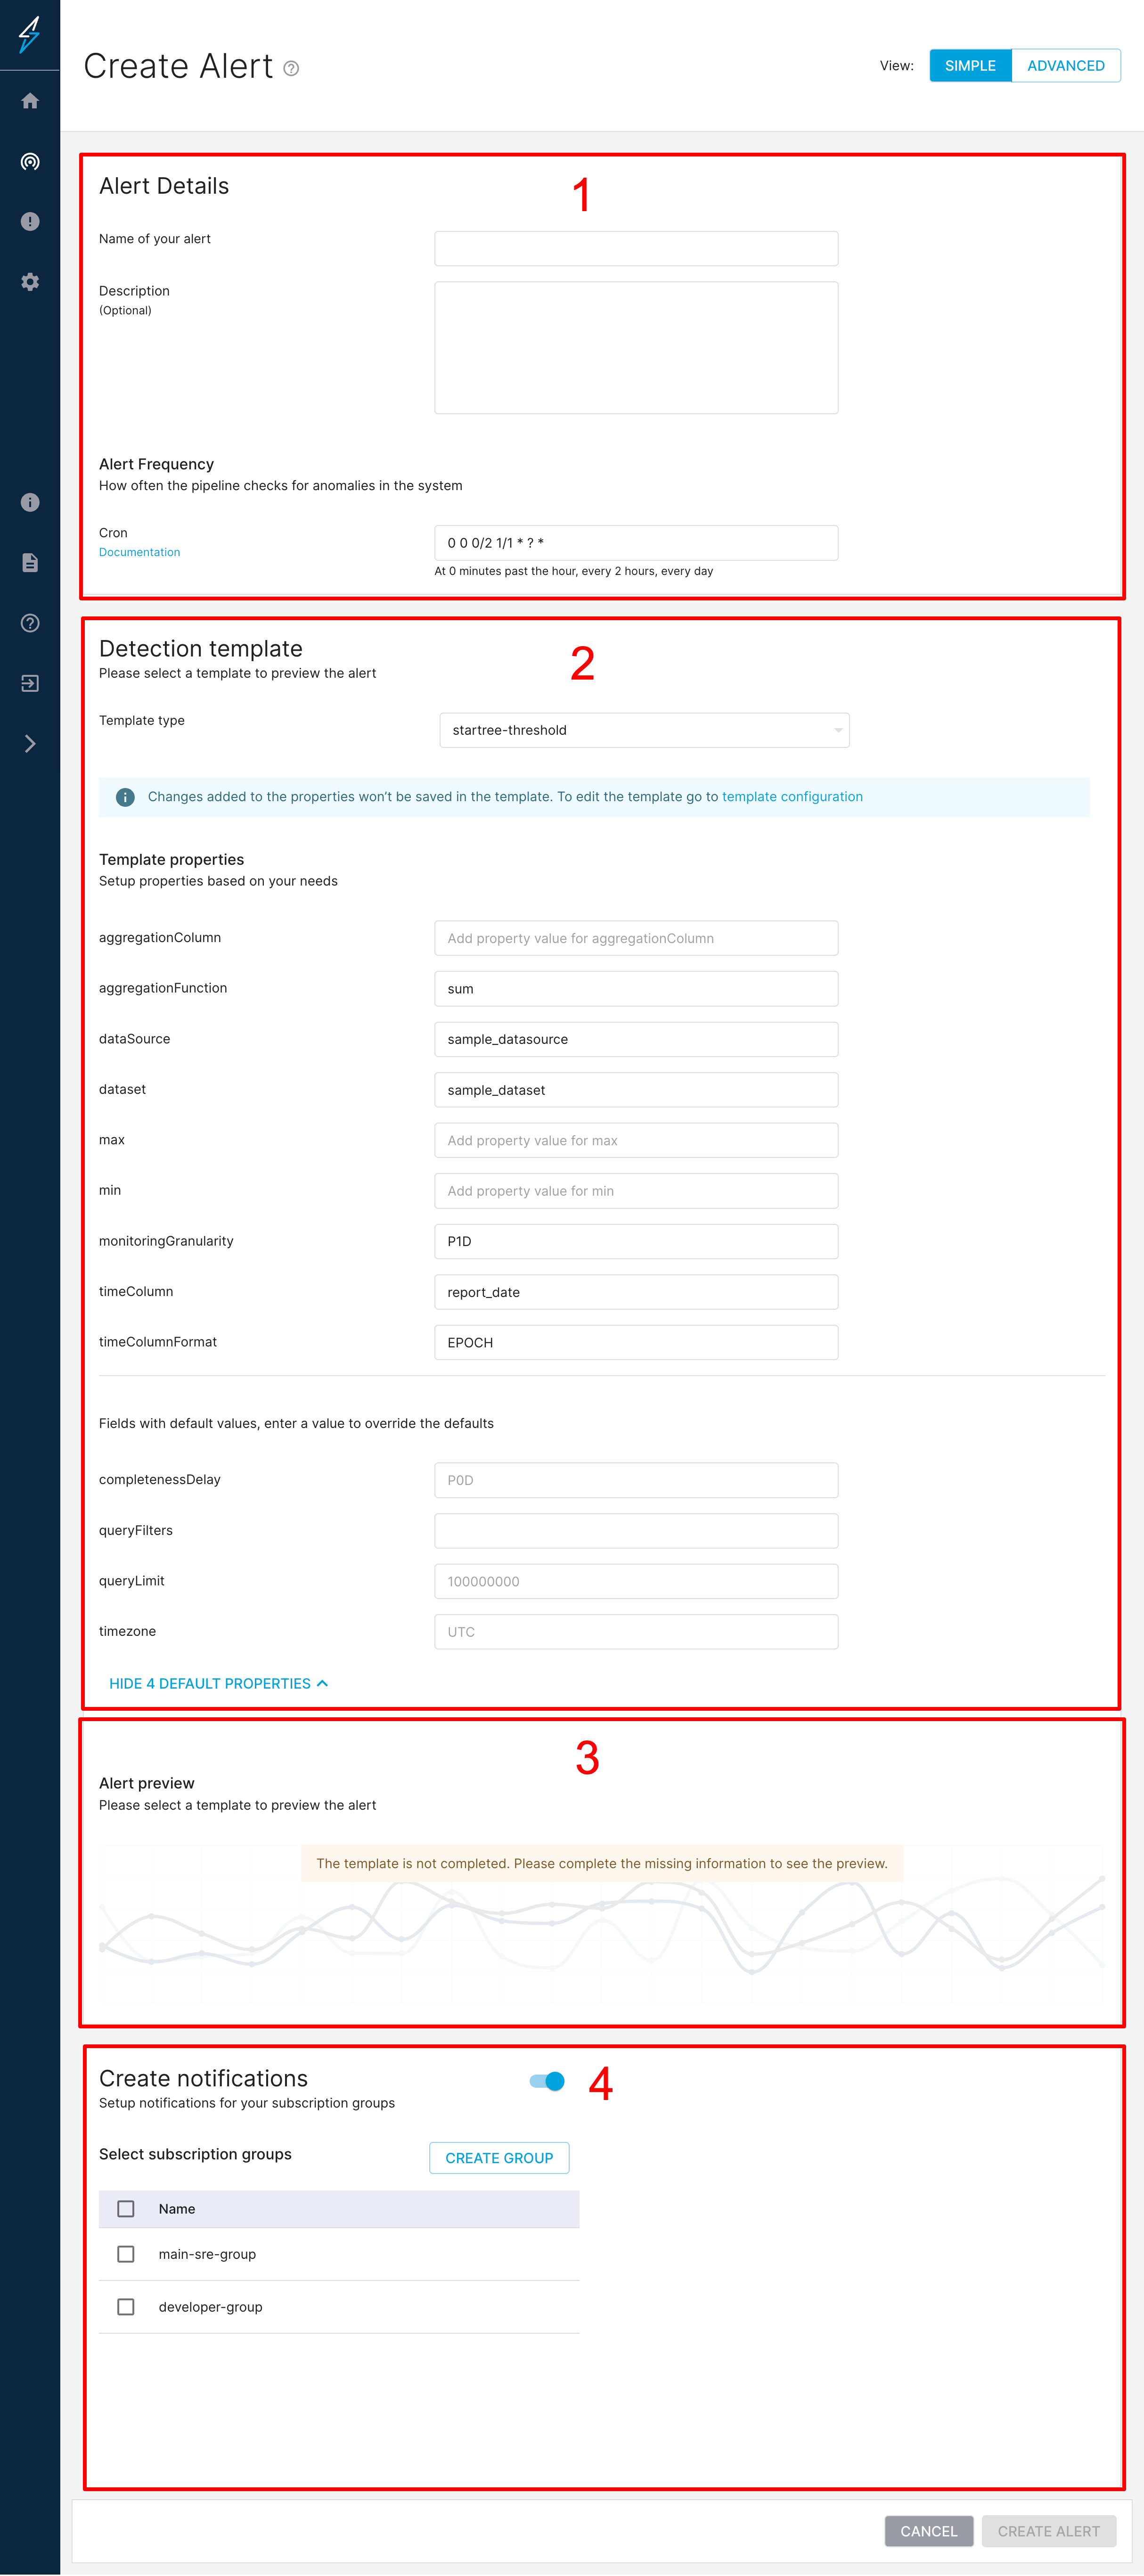
#### 1 - Alert Details
In this section, you will be prompted to input the `name` of the alert. Ensure this is unique and no other existing alert has the same name.
The `description` is optional.
The `cron` section is where you can schedule where you can configure how often the pipelines checks for anomalies. The cron is expected to be in [quartz](http://www.quartz-scheduler.org/documentation/quartz-2.3.0/tutorials/crontrigger.html) format.
#### 2 - Template Property Input
This section allows you to select an [Alert Template](/thirdeye/how-tos/alert/use-templates) to use for your configuration. Alert templates are entities in ThirdEye that help make creating new alerts with less copying and pasting. Several come out of the box with a new installation of ThirdEye. Alert templates require you to enter properties specific to your environment which you will be prompted for in the section below `Template type`.
#### 3 - Preview Configuration
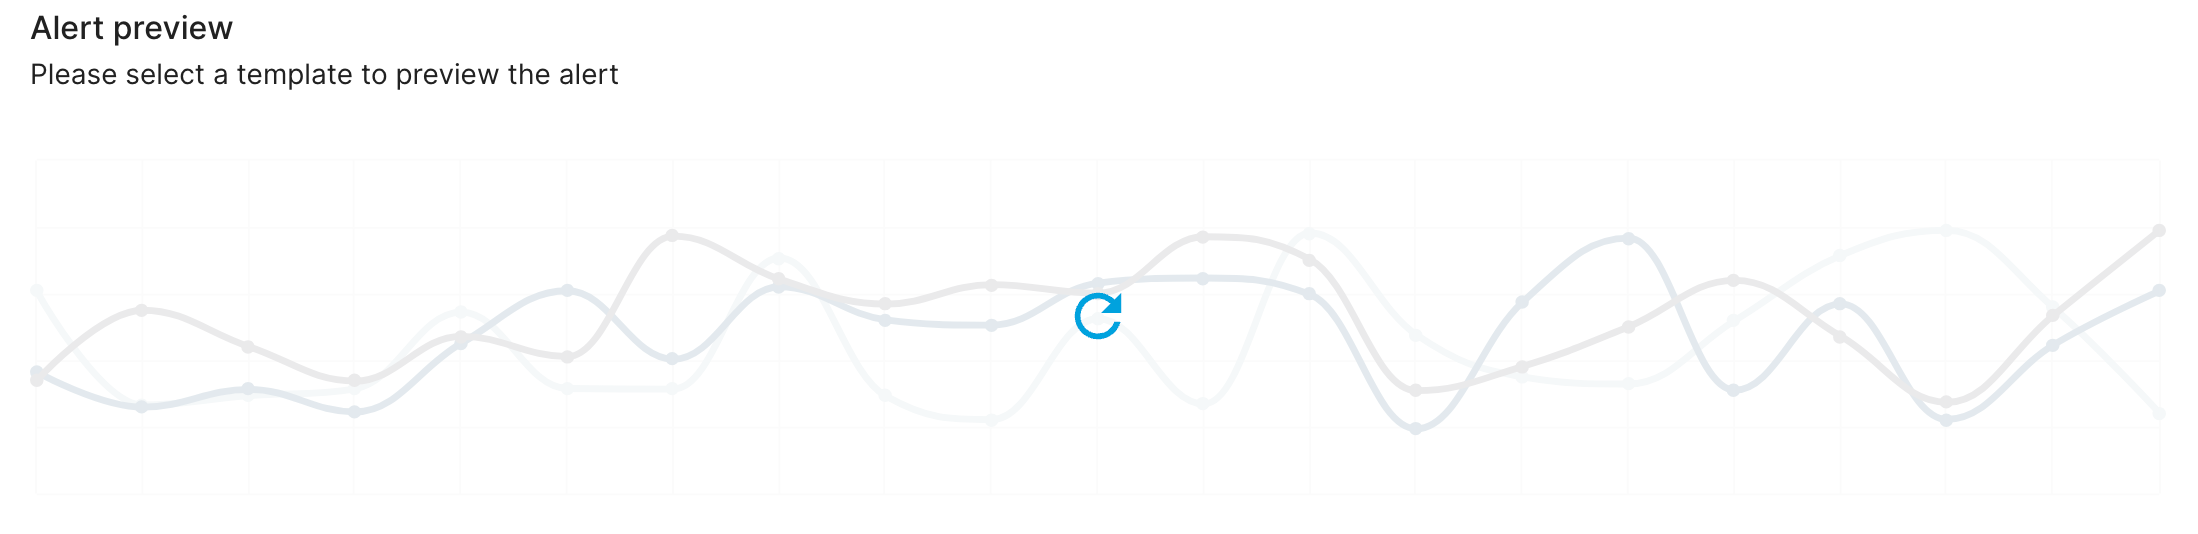
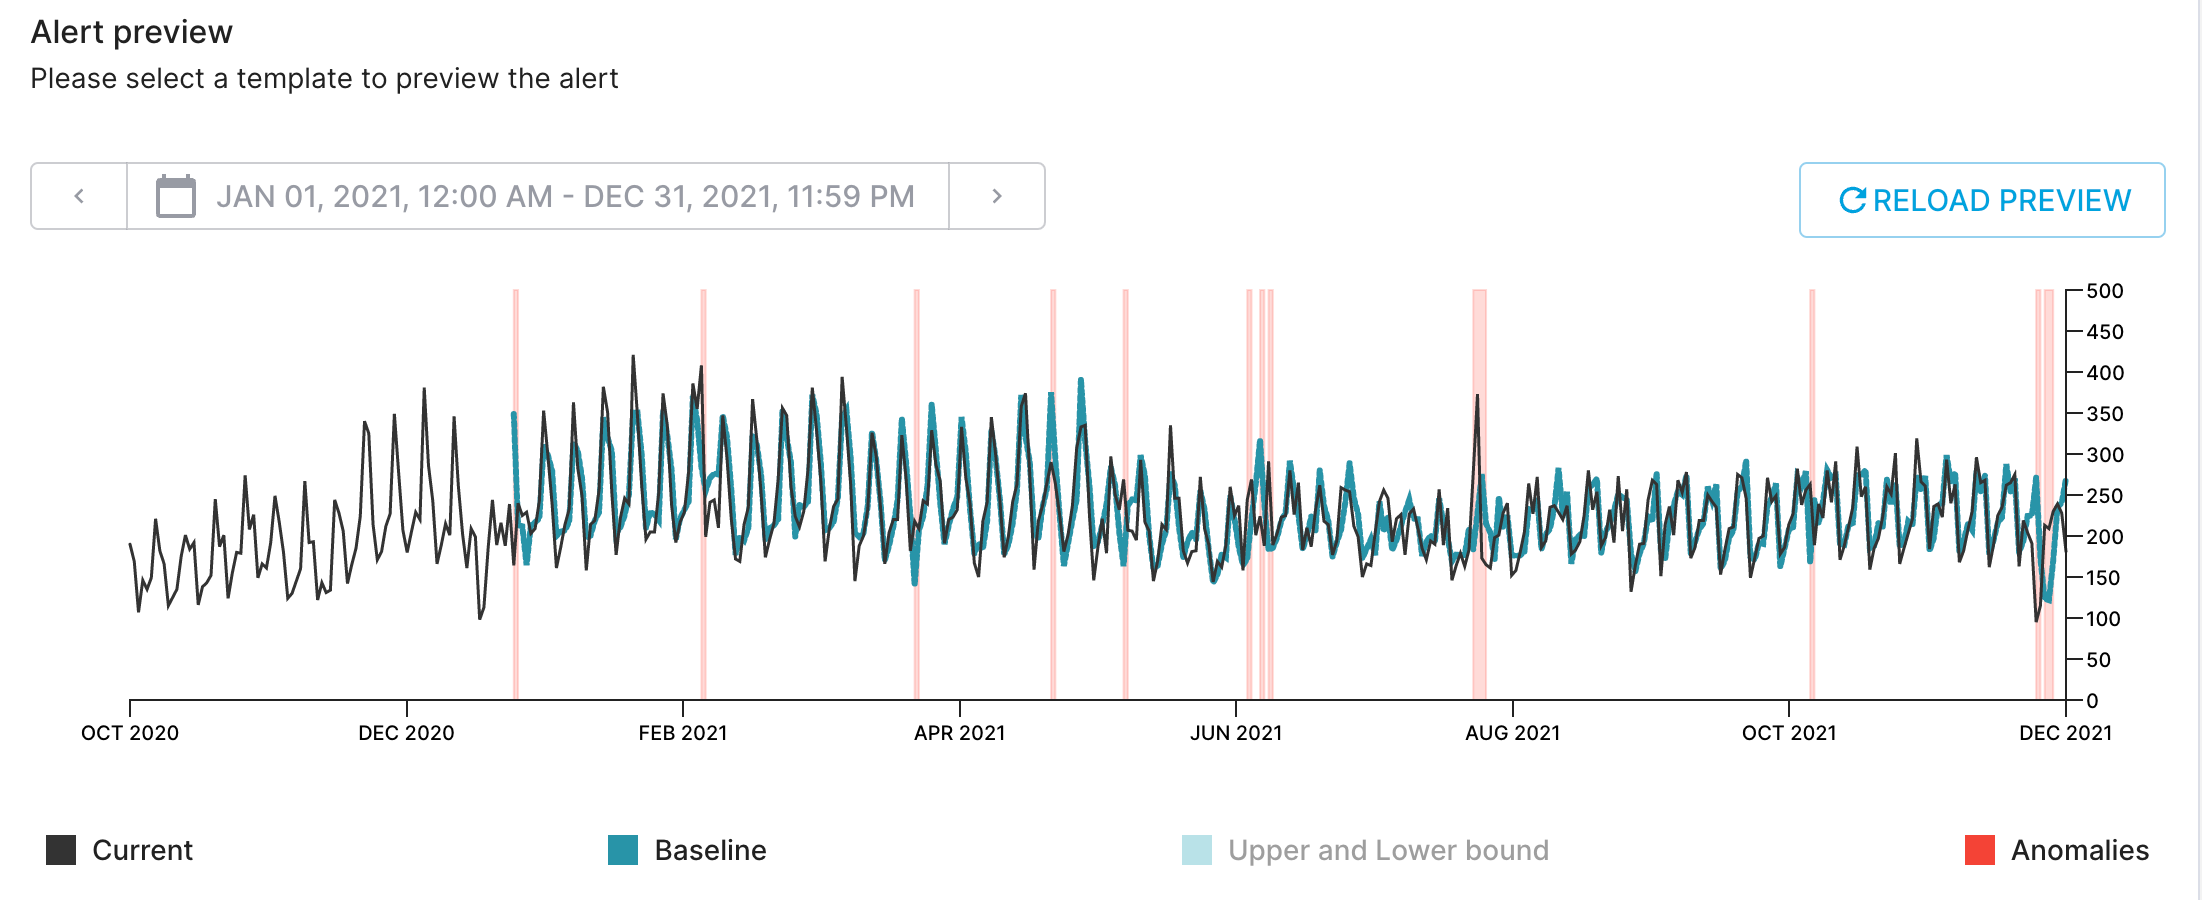
This section allows you to preview the alert configuration by seeing the metric trend and the anomalies that may be detected. You will see a button to preview once all the template properties are input.
The preview button looks like the one below:
When data is loaded, it will look like the screenshot below
#### 4 - Notification Configuration
This section allows you to configure which groups will be alerted when there are new anomalies.
## Advanced Mode
### The Sections
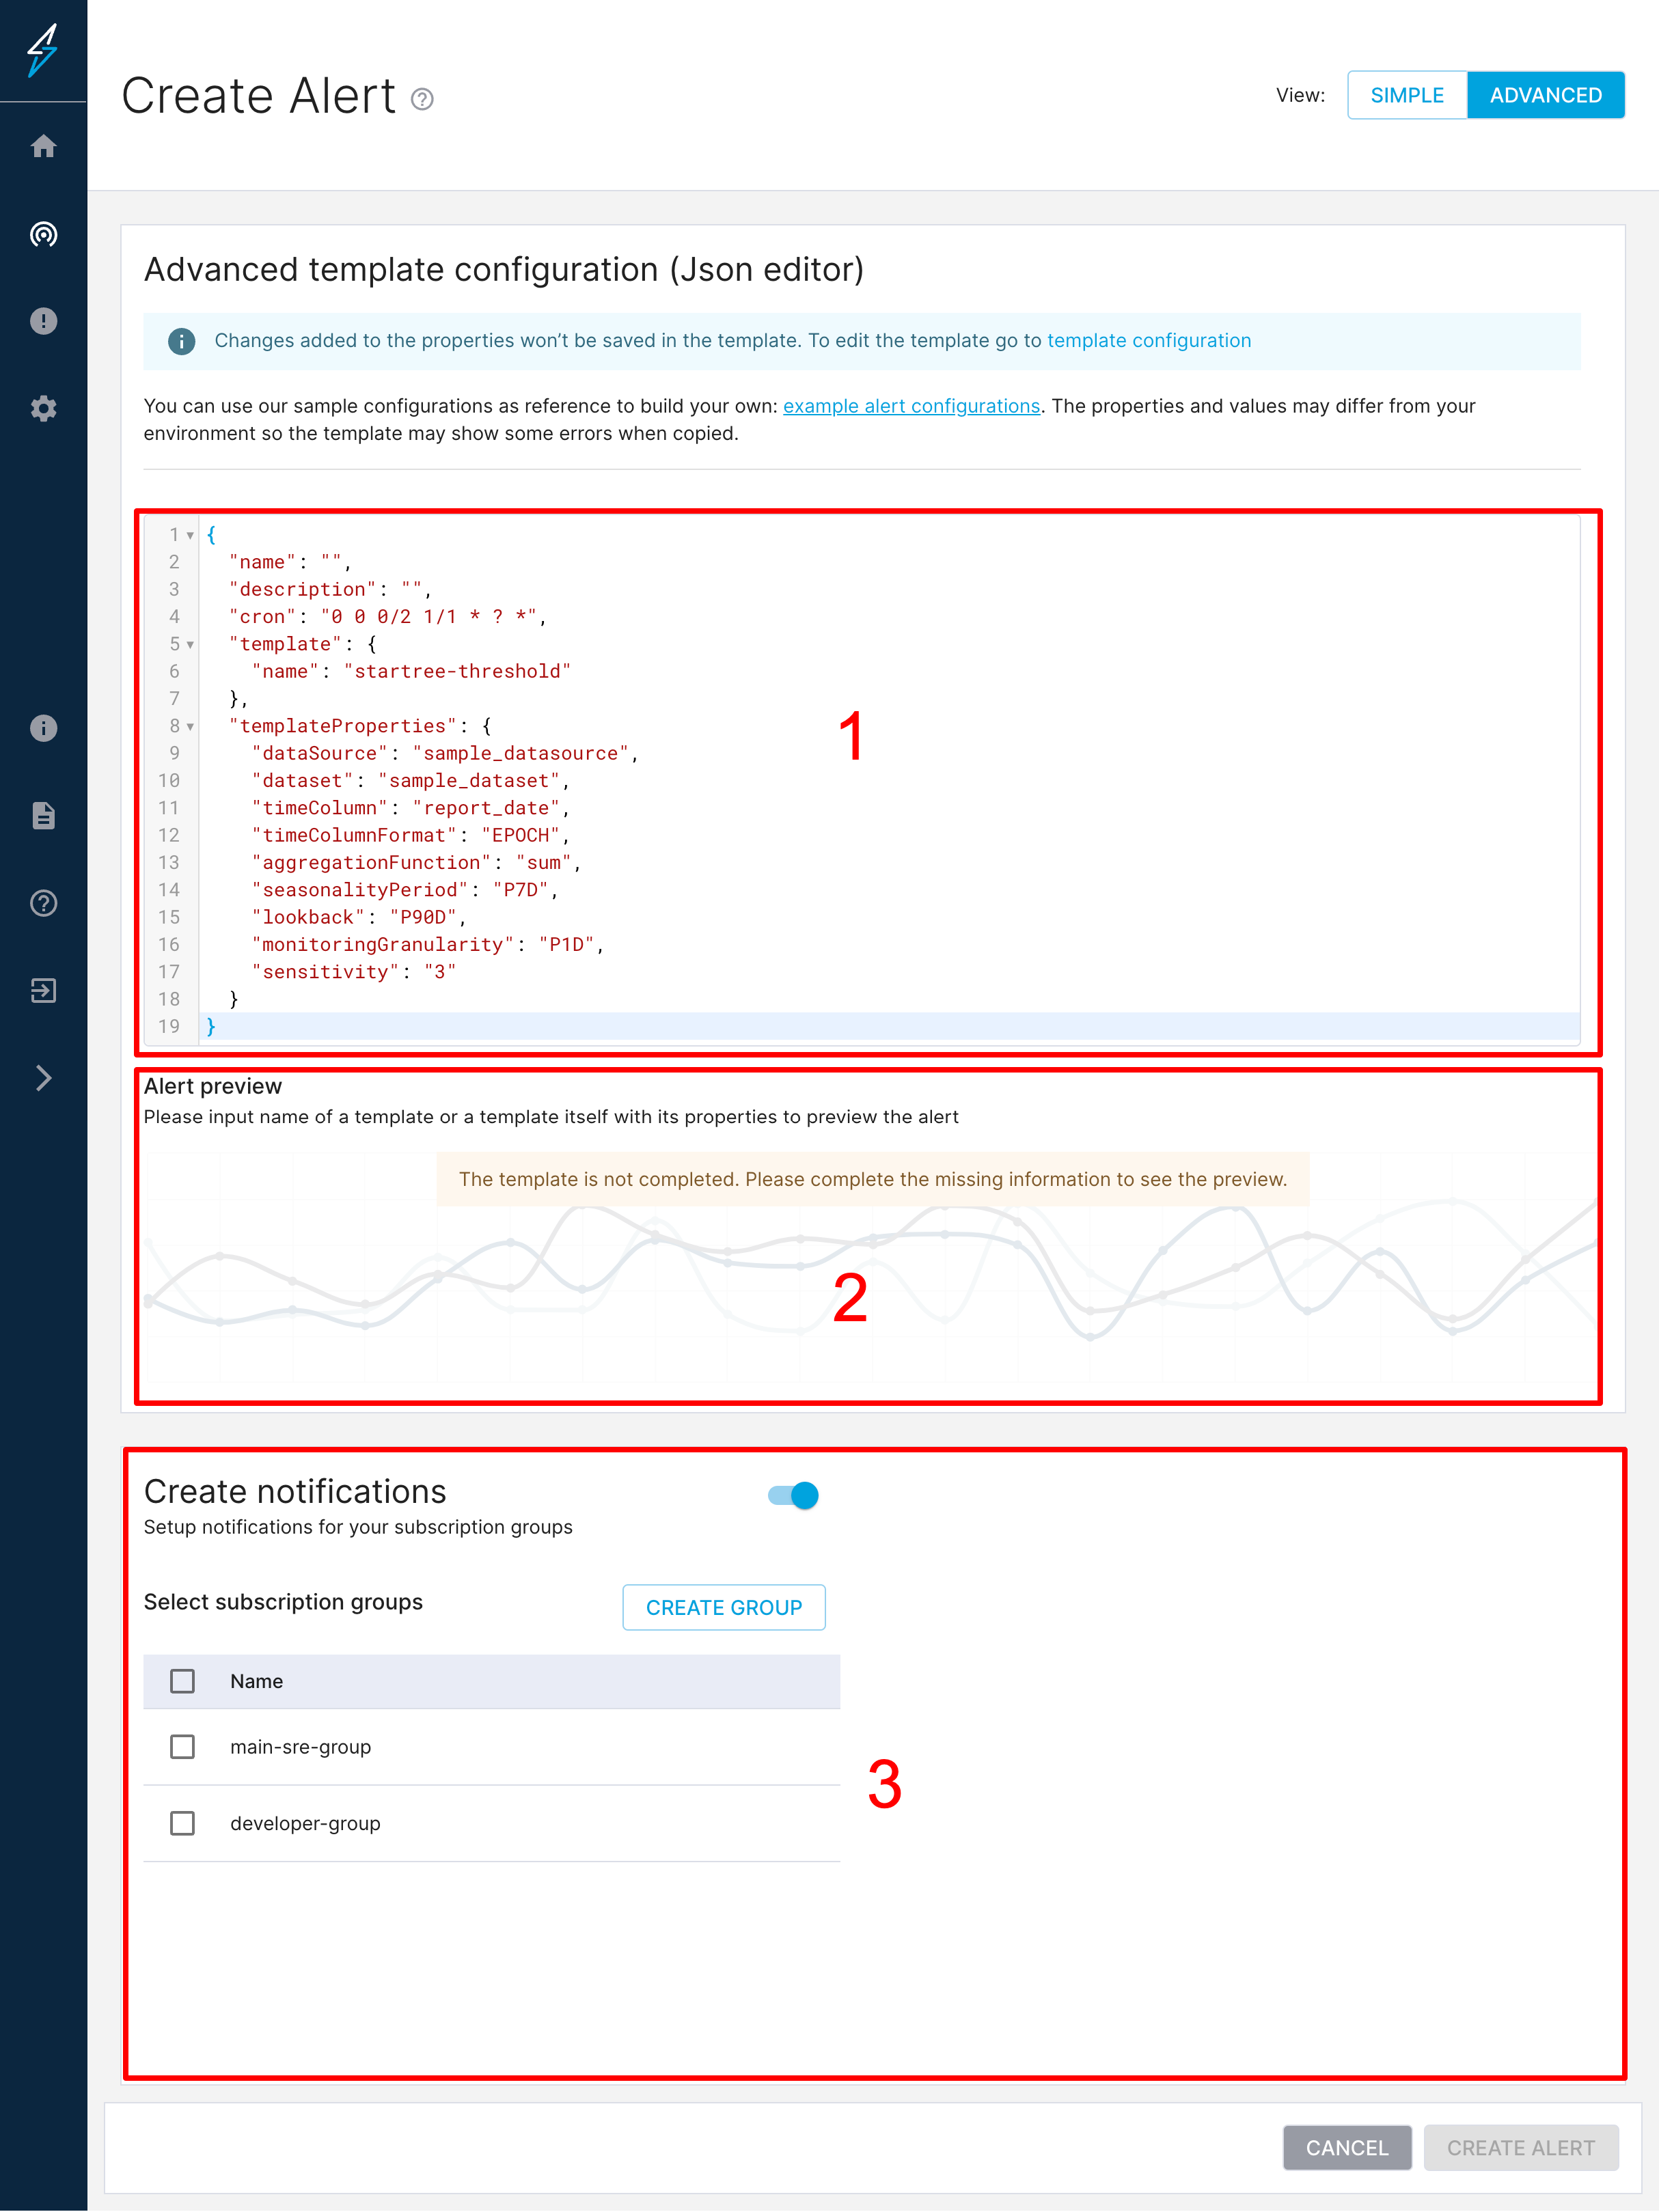
#### 1 - JSON Editor
You can copy and paste JSON into here.
#### 2 - Preview Configuration
This section allows you to preview the alert configuration by seeing the metric trend and the anomalies that may be detected. You will see a button to preview once all the template properties are input.
The preview button looks like the one below:
When data is loaded, it will look like the screenshot below
#### 3 - Notification Configuration
This section allows you to configure which groups will be alerted when there are new anomalies.