> ## Documentation Index
> Fetch the complete documentation index at: https://docs.startree.ai/llms.txt
> Use this file to discover all available pages before exploring further.
# Connect Tableau to StarTree Cloud
> Connect either Tableau Desktop or Tableau Server to your StarTree Cloud instance.
## Prerequisites
* JDBC driver (JAR file)
* Tableau connector (TACO file)
* An API Token (see [Generating an API Token](../security/manage-api-tokens#generating-an-api-token))
## Install the Apache Pinot Driver
1. Build or download the **JDBC driver**.\
You can build the driver from the [source code](https://github.com/apache/pinot/tree/master/pinot-clients/pinot-jdbc-client) or you can [download](https://repo1.maven.org/maven2/org/apache/pinot/pinot-jdbc-client/) one that is already built. In either case, you must use the shaded jar, which will have a filename that includes `shaded`, as in `pinot-jdbc-client-1.0.0-shaded.jar`.
2. Copy the JDBC driver JAR to the Tableau drivers directory.
* On Mac: `~/Library/Tableau/Drivers/`
* On Windows: `C:\Program Files\Tableau\Drivers`
3. Download the **StarTree Tableau Connector** TACO file from the [Tableau Exchange](https://exchange.tableau.com/products/1033), and copy it to the connectors directory.
* On Mac: `/Users/[user]/Documents/My Tableau Repository/Connectors`
* On Windows: `C:\Users\[user]\Documents\My Tableau Repository\Connectors`
You can skip this step if the `Apache Pinot by Startree` connector is already installed (see step 2 below).
4. Launch Tableau.
## Connect Tableau to Apache Pinot
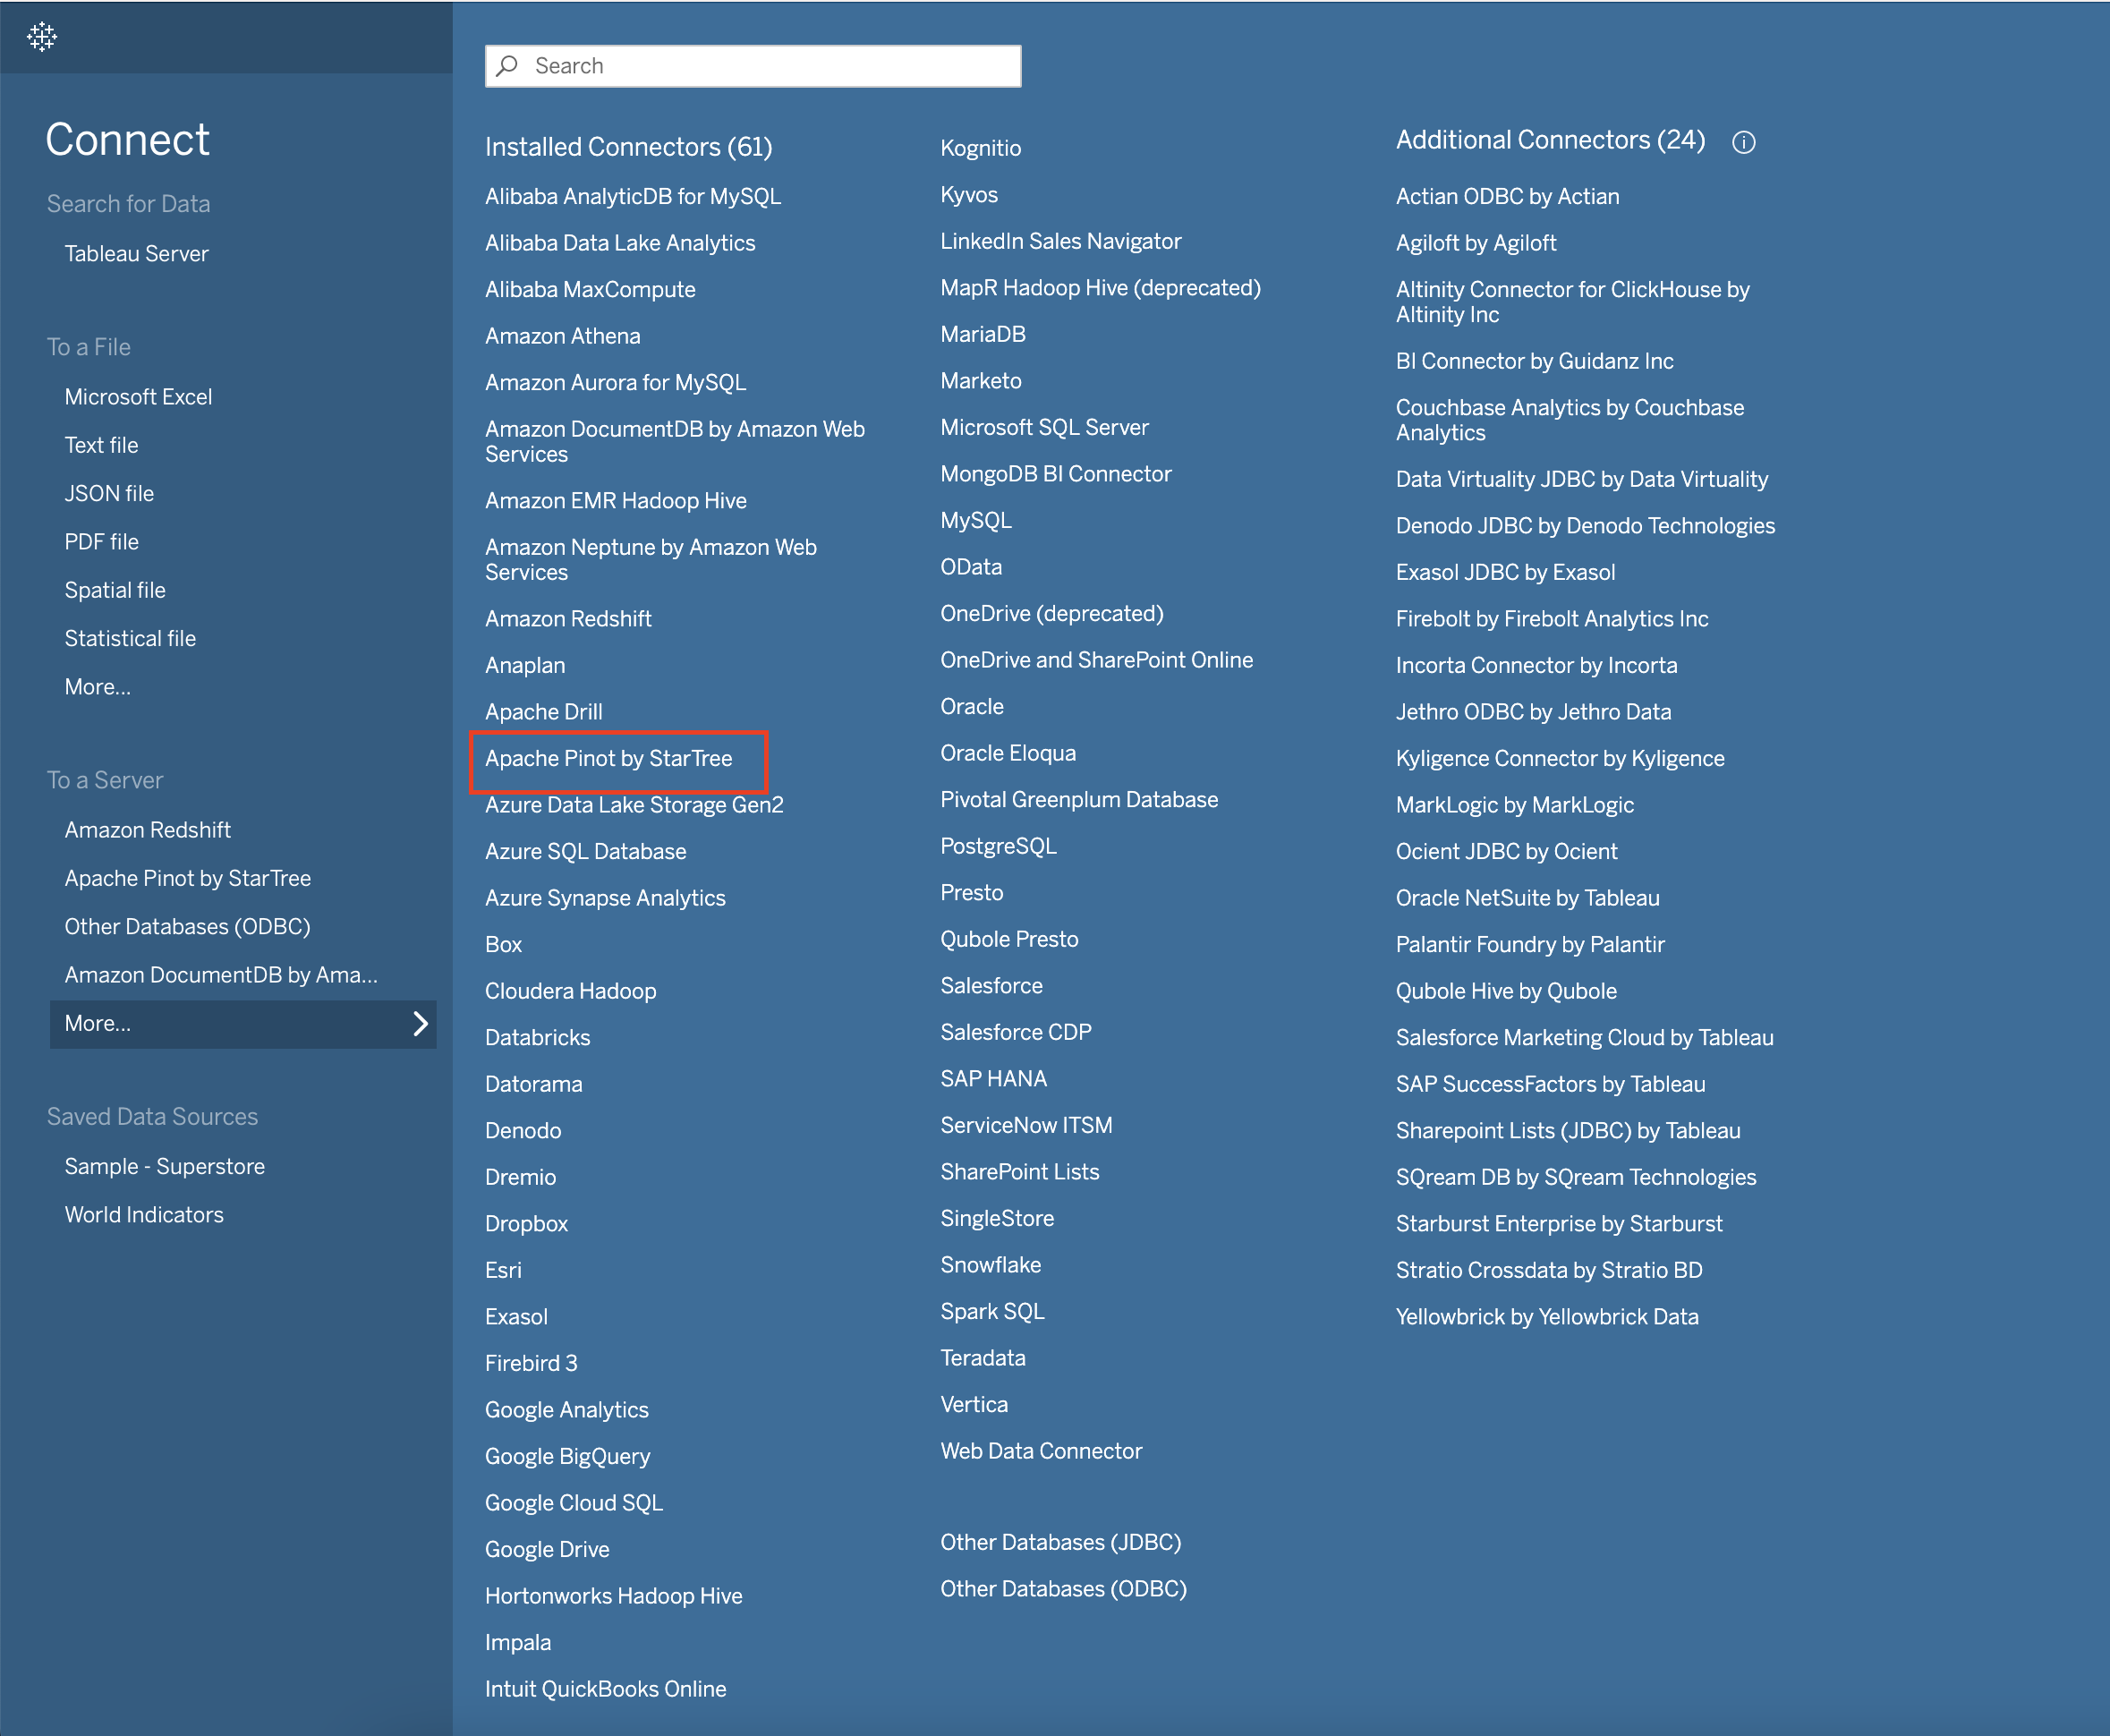
1. On the left side panel, under the **To a Server** section, click the **More...** button.
2. Click on the Apache Pinot by StarTree connector.
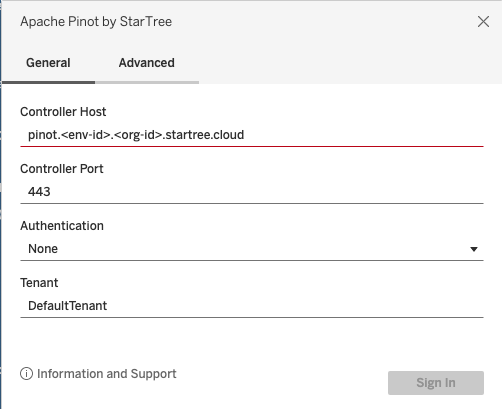
 3. Configure the connection to Pinot:\
a. **Controller Host:** Enter the URL to your Pinot cluster, in the form of `pinot...startree.cloud`\
b. **Port:** This would typically be `9000` or `443`\
c. **Authentication:** Leave this set to `None` (we will handle authentication in the ‘Advanced’ tab).
3. Configure the connection to Pinot:\
a. **Controller Host:** Enter the URL to your Pinot cluster, in the form of `pinot...startree.cloud`\
b. **Port:** This would typically be `9000` or `443`\
c. **Authentication:** Leave this set to `None` (we will handle authentication in the ‘Advanced’ tab).
 d. Click on the **Advanced** tab.\
e. Set the **Scheme** to HTTPS.\
f. Enable TLS for Controller and Brokers.\
g. Using the API token that you obtained in the prerequisites, enter `headers.Authorization=Bearer ` in the **Additional Properties** text box (e.g. `headers.Authorization=Bearer st-N5zM7kPqW8xR3aVb-H1gJ4fD6sA9zX2cC5vB8nL0kM7pQ2wE4rT6`).
d. Click on the **Advanced** tab.\
e. Set the **Scheme** to HTTPS.\
f. Enable TLS for Controller and Brokers.\
g. Using the API token that you obtained in the prerequisites, enter `headers.Authorization=Bearer ` in the **Additional Properties** text box (e.g. `headers.Authorization=Bearer st-N5zM7kPqW8xR3aVb-H1gJ4fD6sA9zX2cC5vB8nL0kM7pQ2wE4rT6`).
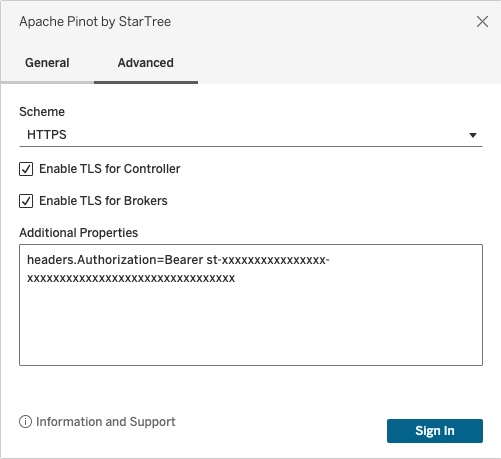 h. click **Sign In**.
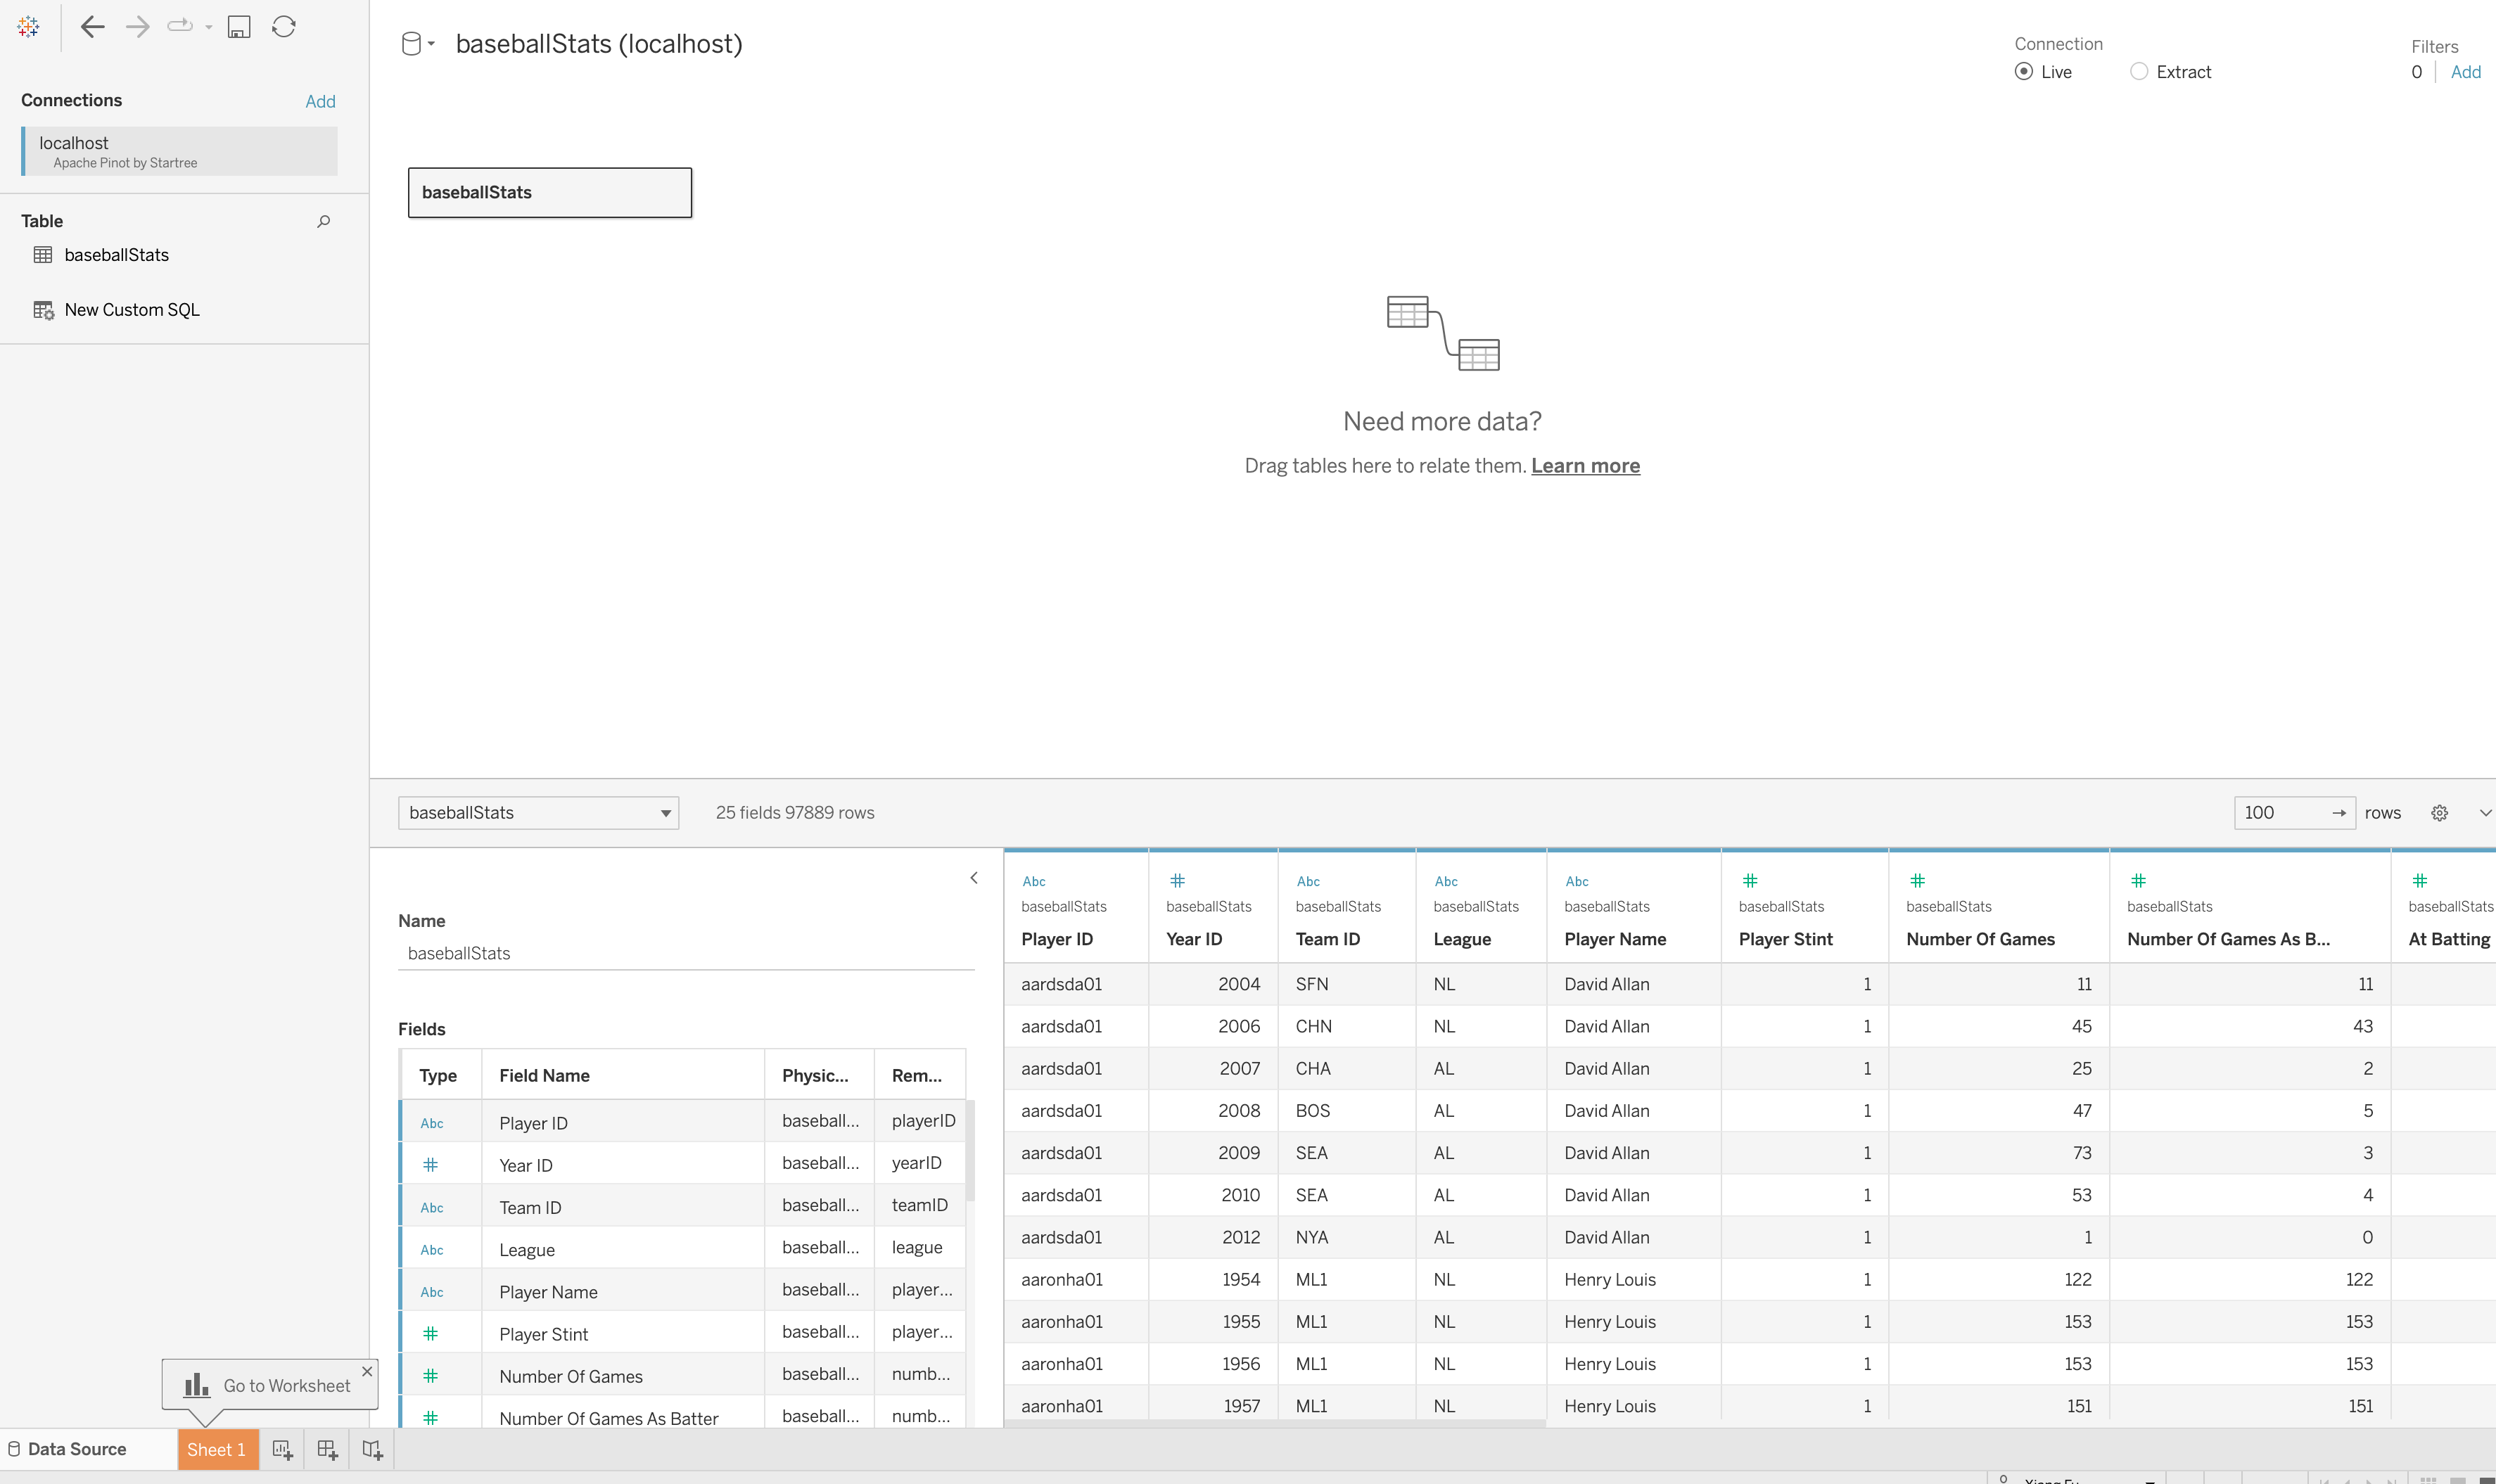
4. Once you are connected, you will be able to see the data from your data source and can begin to query.
h. click **Sign In**.
4. Once you are connected, you will be able to see the data from your data source and can begin to query.