> ## Documentation Index
> Fetch the complete documentation index at: https://docs.startree.ai/llms.txt
> Use this file to discover all available pages before exploring further.
# Okta
> Configure Okta as your Identity Provider (IdP) with StarTree. Integrating Okta enables centralized authentication, enhanced security, and streamlined user management, simplifying access to StarTree.
## Prerequisites
1. Admin access to an Okta account \
(For example: `https://dev-1234567-admin.okta.com/admin`)
2. Access to a StarTree environment.
3. Obtain the sign-in and sign-out redirect URLs from StarTree.
## Steps
1. Sign in to Okta as an admin.
2. Click on **Applications** in the left navigation menu.
3. Create a new Application:
a. Click **Create App Integration**.
b. Select **OIDC - OpenID Connect** as the sign-in method.
c. Select **Web Application** as the application type.
d. Click **Next**.
e. Enter the **App integration** **name**.
f. Fill in the **sign-in** and **sign-out redirect URLs** provided to you by StarTree.
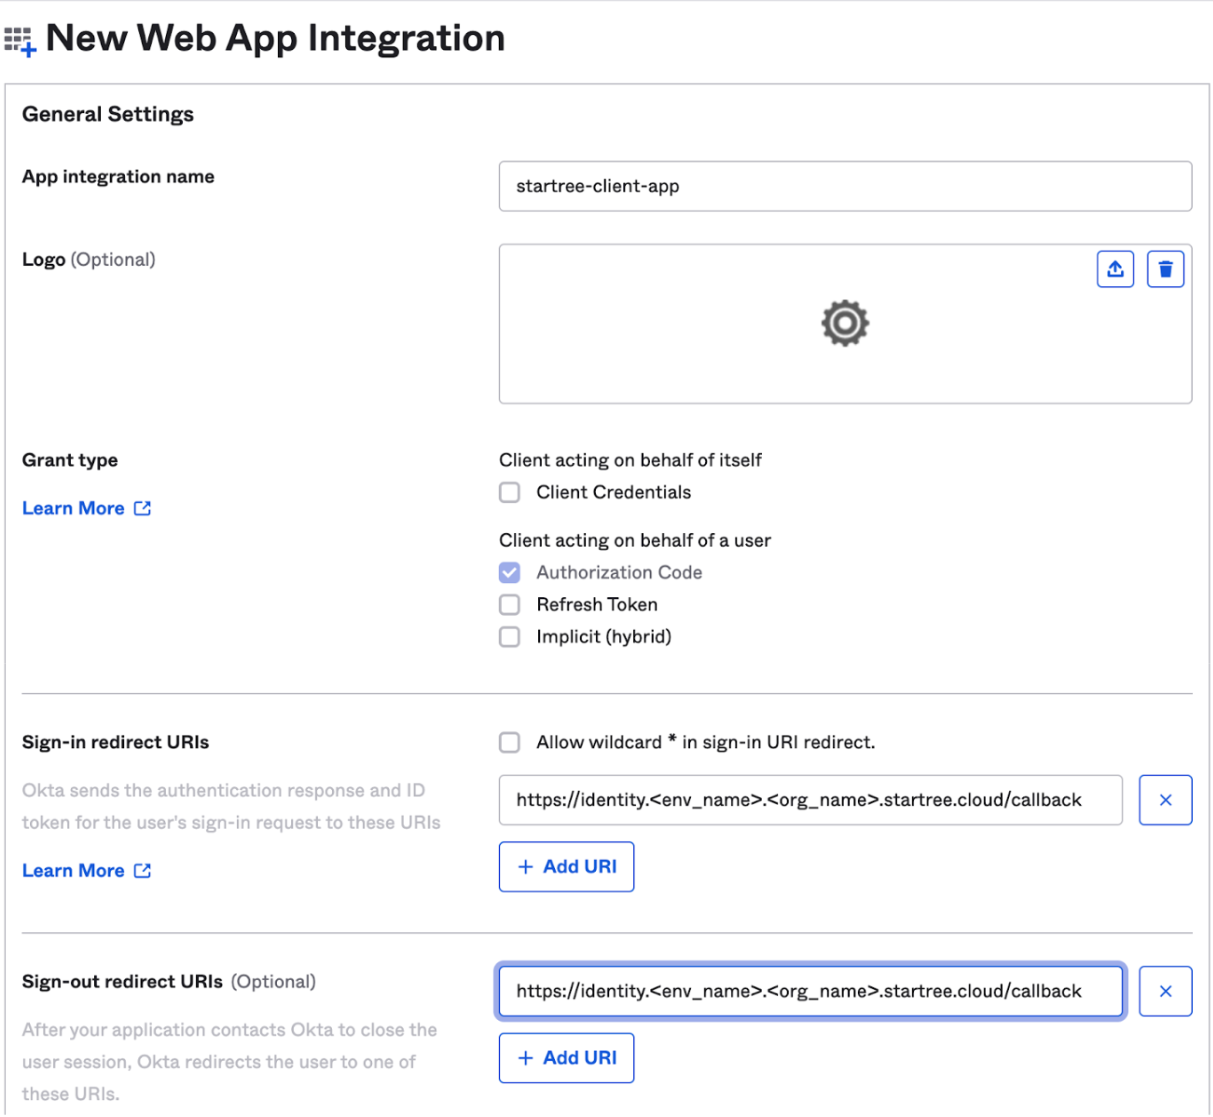 g. Choose the **controlled access** method that best fits your needs. If you’re not sure, you can select the option to skip group assignments for now
h. Click **Save** to create the application
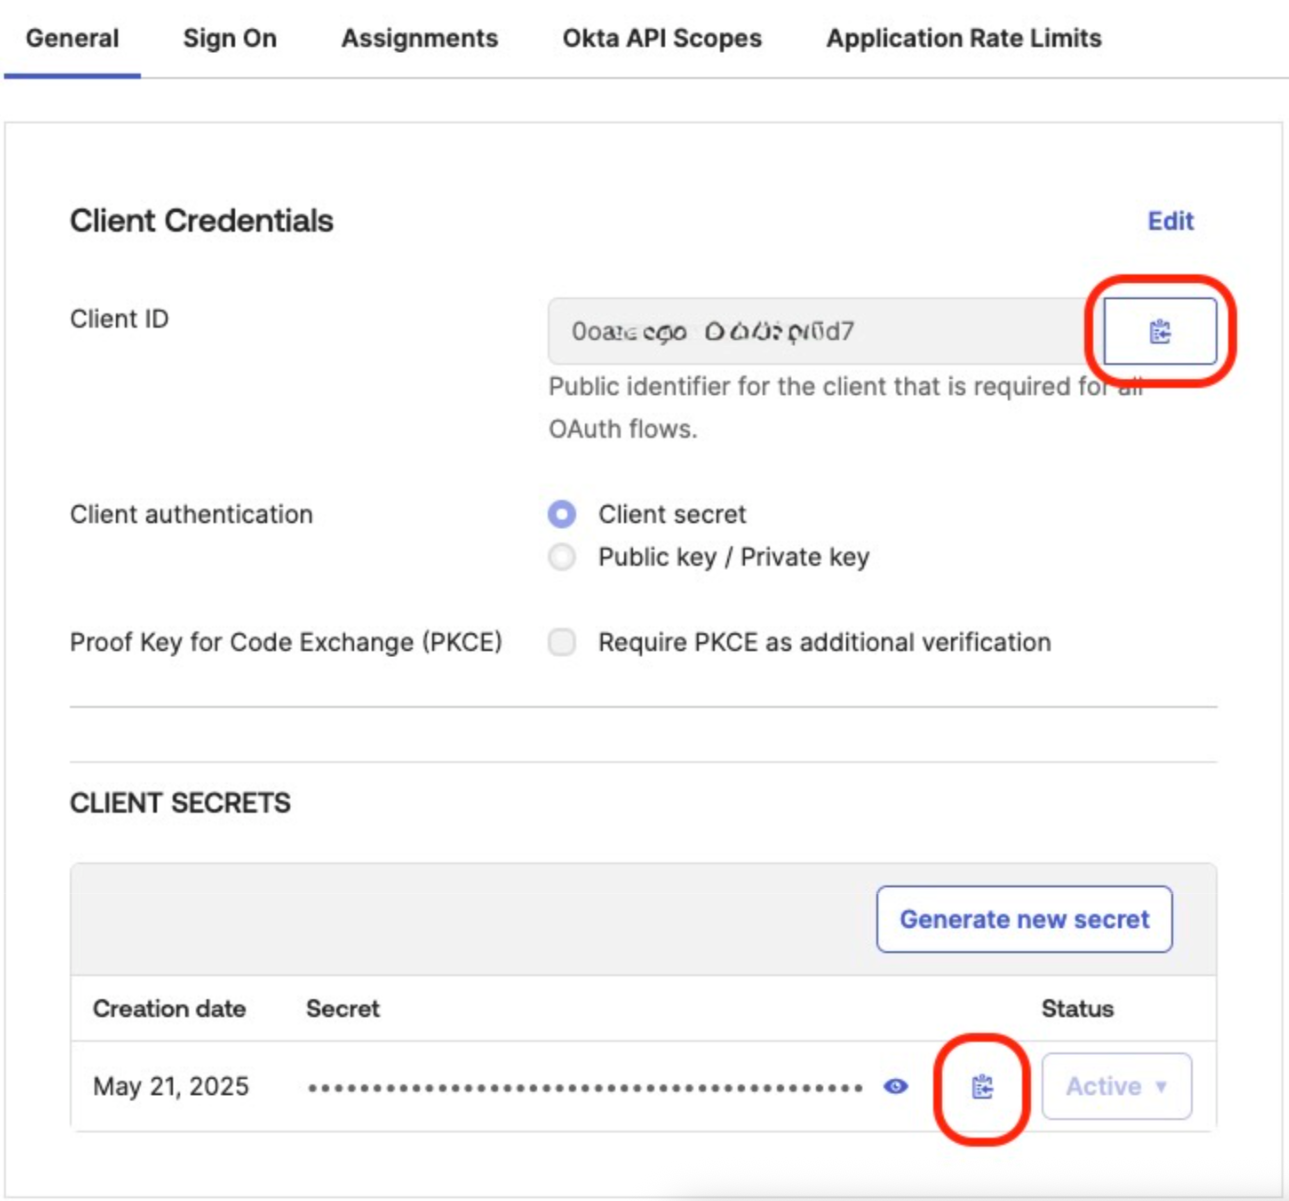
4. Obtain the **Client ID** and **Client Secret**. You will need to provide these to StarTree.
g. Choose the **controlled access** method that best fits your needs. If you’re not sure, you can select the option to skip group assignments for now
h. Click **Save** to create the application
4. Obtain the **Client ID** and **Client Secret**. You will need to provide these to StarTree.
 5. Configure the groups claim:\
a. Click on the **Sign-on** tab. \
b. Click **Edit** in the **OpenID Connect ID Token** section.\
c. Click the **Issuer** dropdown and select **Okta URL**. \
d. Click **Save.** \
e. Copy the **Issuer URL** (example: `https://dev-1234567.okta.com`) . You will need to provide it to StarTree. \
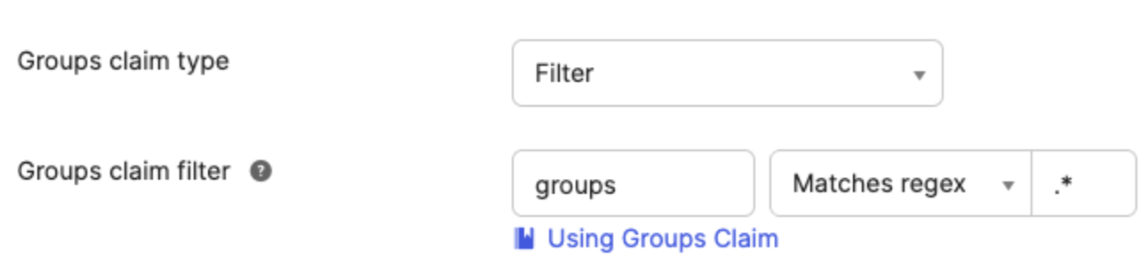
f. If groups are managed in Okta: \
To have Okta return the list of all groups that a signed-in user belongs to, change the **Groups claim filter** to **Matches regex** and set the expression as needed (use `.*` to always include all groups that a user belongs to).
5. Configure the groups claim:\
a. Click on the **Sign-on** tab. \
b. Click **Edit** in the **OpenID Connect ID Token** section.\
c. Click the **Issuer** dropdown and select **Okta URL**. \
d. Click **Save.** \
e. Copy the **Issuer URL** (example: `https://dev-1234567.okta.com`) . You will need to provide it to StarTree. \
f. If groups are managed in Okta: \
To have Okta return the list of all groups that a signed-in user belongs to, change the **Groups claim filter** to **Matches regex** and set the expression as needed (use `.*` to always include all groups that a user belongs to).
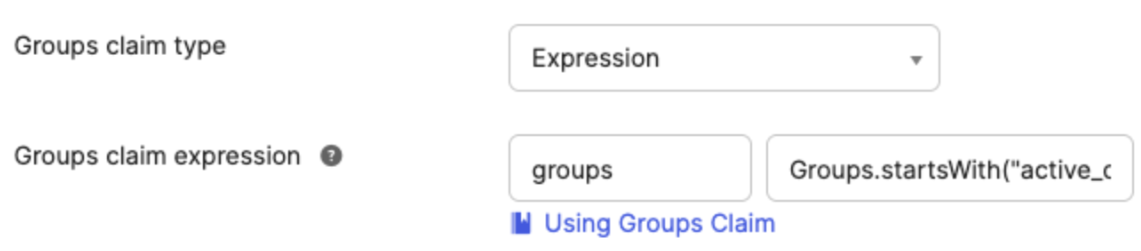
 g. If groups are managed outside of Okta (for example, in Active Directory): \
Set the “Groups claim type” to “Expression”, and enter the appropriate expression (e.g. **Groups.startsWith("active\_directory”,”my-group-name”,100)**).\
For more info, refer to the [Okta Help Center](https://support.okta.com/help/s/article/Why-isnt-my-Groups-claim-returning-Active-Directory-groups?language=en_US).
g. If groups are managed outside of Okta (for example, in Active Directory): \
Set the “Groups claim type” to “Expression”, and enter the appropriate expression (e.g. **Groups.startsWith("active\_directory”,”my-group-name”,100)**).\
For more info, refer to the [Okta Help Center](https://support.okta.com/help/s/article/Why-isnt-my-Groups-claim-returning-Active-Directory-groups?language=en_US).
 6. \[Optional] If you are using Okta’s [Custom Authorization Server](https://developer.okta.com/docs/concepts/auth-servers/#custom-authorization-server), then you will need to add the groups claim to the ID token.\
a. Navigate to the **Authorization Servers** section.\
b. Open the relevant custom authorization server.\
c. Click on the **Claims** tab.\
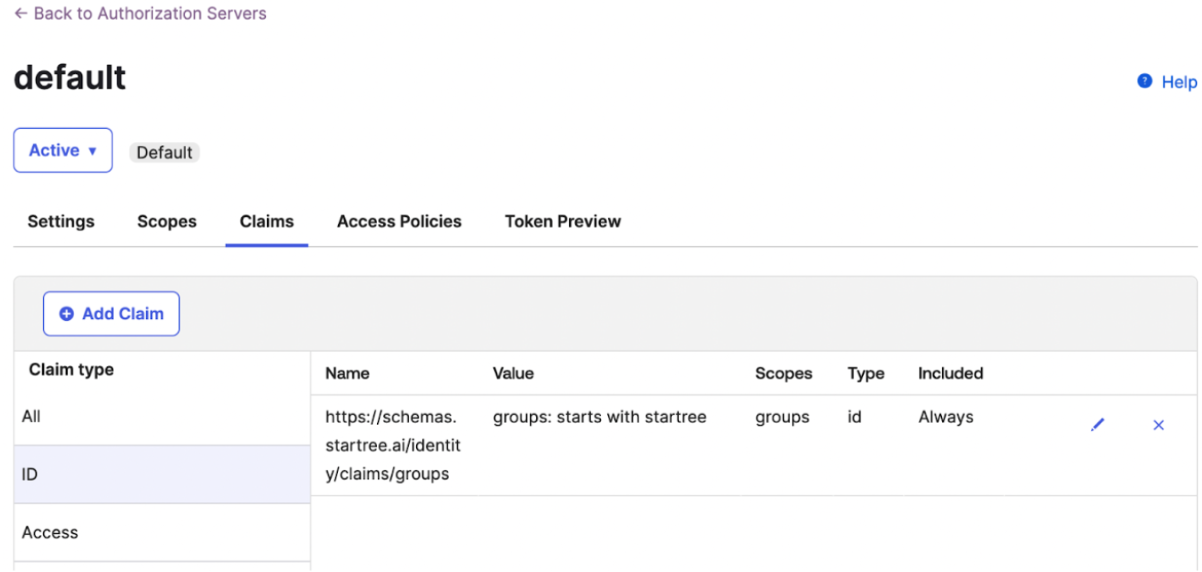
d. Under the ID claim type, enter the following claim name: `https://schemas.startree.ai/identity/claims/groups`, and set the value as needed.
6. \[Optional] If you are using Okta’s [Custom Authorization Server](https://developer.okta.com/docs/concepts/auth-servers/#custom-authorization-server), then you will need to add the groups claim to the ID token.\
a. Navigate to the **Authorization Servers** section.\
b. Open the relevant custom authorization server.\
c. Click on the **Claims** tab.\
d. Under the ID claim type, enter the following claim name: `https://schemas.startree.ai/identity/claims/groups`, and set the value as needed.
 7. To complete the configuration of Okta IdP in StarTree, provide the following details that you obtained in the previous steps:
* **App integration name.**
* **Client ID** and **Client Secret.**
* **Issuer URL.**
### Granting User and Group Access to StarTree
* You can assign users and groups directly to the application by clicking the **Assignments** tab.
* Alternatively, to create new groups or manage user and application assignments within a group, go to **Directory** > **Groups** in the left navigation menu. You may also need to grant your app permission to manage and read groups:
1. In your app, click on the **Okta API Scopes** tab.
2. Find the relevant groups permission and click **Grant.**
7. To complete the configuration of Okta IdP in StarTree, provide the following details that you obtained in the previous steps:
* **App integration name.**
* **Client ID** and **Client Secret.**
* **Issuer URL.**
### Granting User and Group Access to StarTree
* You can assign users and groups directly to the application by clicking the **Assignments** tab.
* Alternatively, to create new groups or manage user and application assignments within a group, go to **Directory** > **Groups** in the left navigation menu. You may also need to grant your app permission to manage and read groups:
1. In your app, click on the **Okta API Scopes** tab.
2. Find the relevant groups permission and click **Grant.**