> ## Documentation Index
> Fetch the complete documentation index at: https://docs.startree.ai/llms.txt
> Use this file to discover all available pages before exploring further.
# Microsoft Entra ID
> Configure Microsoft Entra ID as your Identity Provider (IdP) with StarTree. Microsoft Entra ID enables centralized authentication, enhanced security, and streamlined user management, simplifying access to StarTree.
## Prerequisites
1. Admin access to the [Azure portal](https://portal.azure.com/).
2. Access to a StarTree environment.
3. Obtain the redirect URI from StarTree.
## Steps
### Register the StarTree App
1. Navigate to the Microsoft Azure portal.
2. Select **Microsoft Entra ID** from the portal menu.
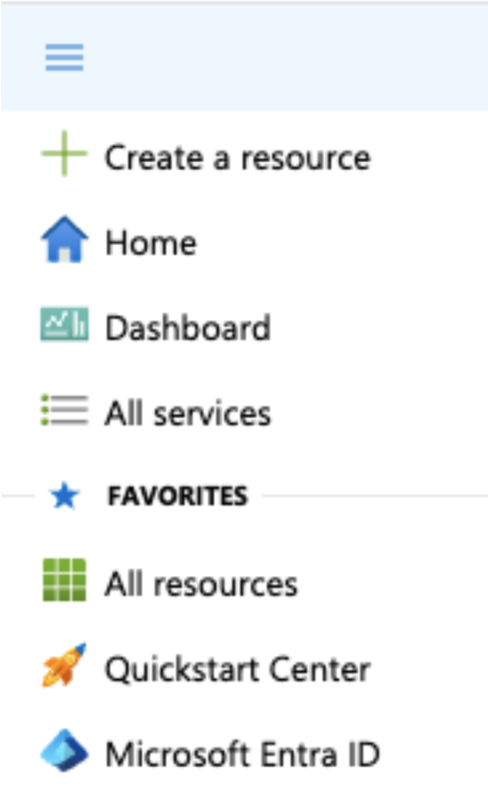 3. Click on **Add** and select **App registration** to register a new app.
4. Specify a name for the application and select the supported account types option that fits your needs.
5. Under **Redirect URI**, select **Web** as the platform, and enter the URL that was provided by StarTree.
3. Click on **Add** and select **App registration** to register a new app.
4. Specify a name for the application and select the supported account types option that fits your needs.
5. Under **Redirect URI**, select **Web** as the platform, and enter the URL that was provided by StarTree.
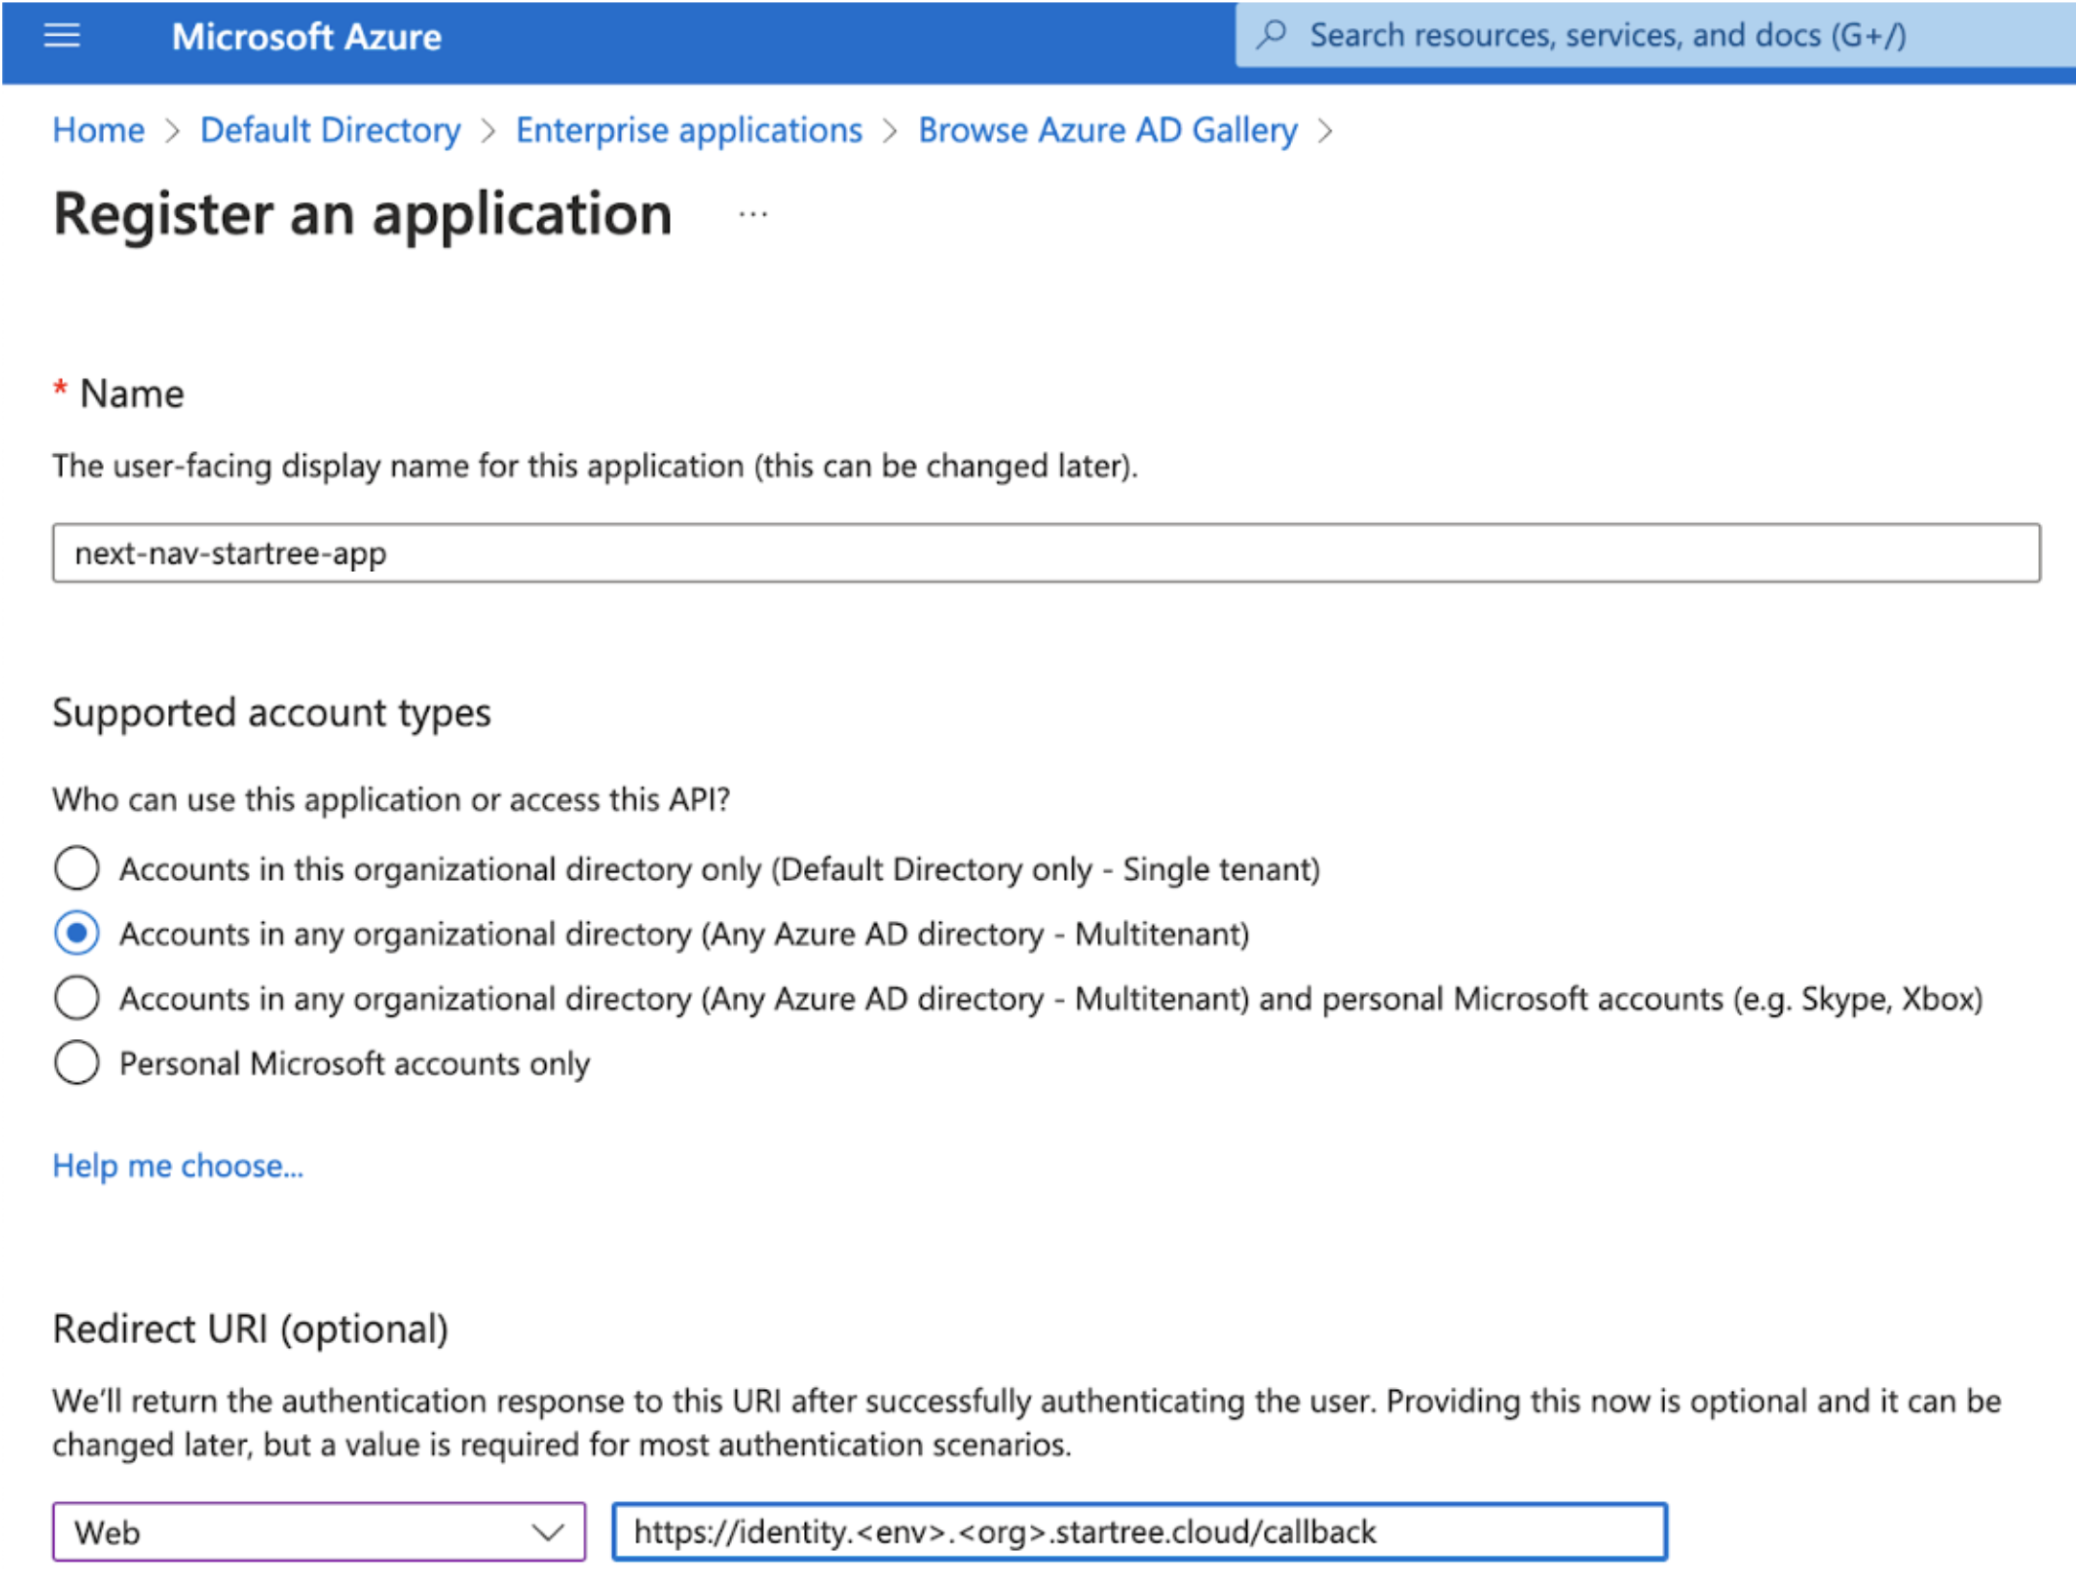 6. **Register** the application.
7. Copy the **Application (client) ID** and the **Directory (tenant) ID**. You will need to provide these to StarTree.
8. Click **Add a certificate or secret** and create a new client secret. Save the client secret **Value**. You will need to provide this to StarTree.
9. Make sure the users have the email address field populated.
### Provide the following details to StarTree
* Application (client) ID.
* Directory (tenant) ID.
* Client secret.
* Issuer URL: [https://login.microsoftonline.com//v2.0](https://login.microsoftonline.com/\{tenantid}/v2.0) (replace the tenant ID with the actual value).
### \[Optional] Enable Groups Claim
To enable groups claim for an application in Azure AD for OpenID Connect, complete the following steps:
1. Select **Azure Active Directory** from the left navigation menu.
2. Select **App registrations**.
3. Select the application you just created.
4. Select **Token configuration** from the left navigation menu
6. **Register** the application.
7. Copy the **Application (client) ID** and the **Directory (tenant) ID**. You will need to provide these to StarTree.
8. Click **Add a certificate or secret** and create a new client secret. Save the client secret **Value**. You will need to provide this to StarTree.
9. Make sure the users have the email address field populated.
### Provide the following details to StarTree
* Application (client) ID.
* Directory (tenant) ID.
* Client secret.
* Issuer URL: [https://login.microsoftonline.com//v2.0](https://login.microsoftonline.com/\{tenantid}/v2.0) (replace the tenant ID with the actual value).
### \[Optional] Enable Groups Claim
To enable groups claim for an application in Azure AD for OpenID Connect, complete the following steps:
1. Select **Azure Active Directory** from the left navigation menu.
2. Select **App registrations**.
3. Select the application you just created.
4. Select **Token configuration** from the left navigation menu
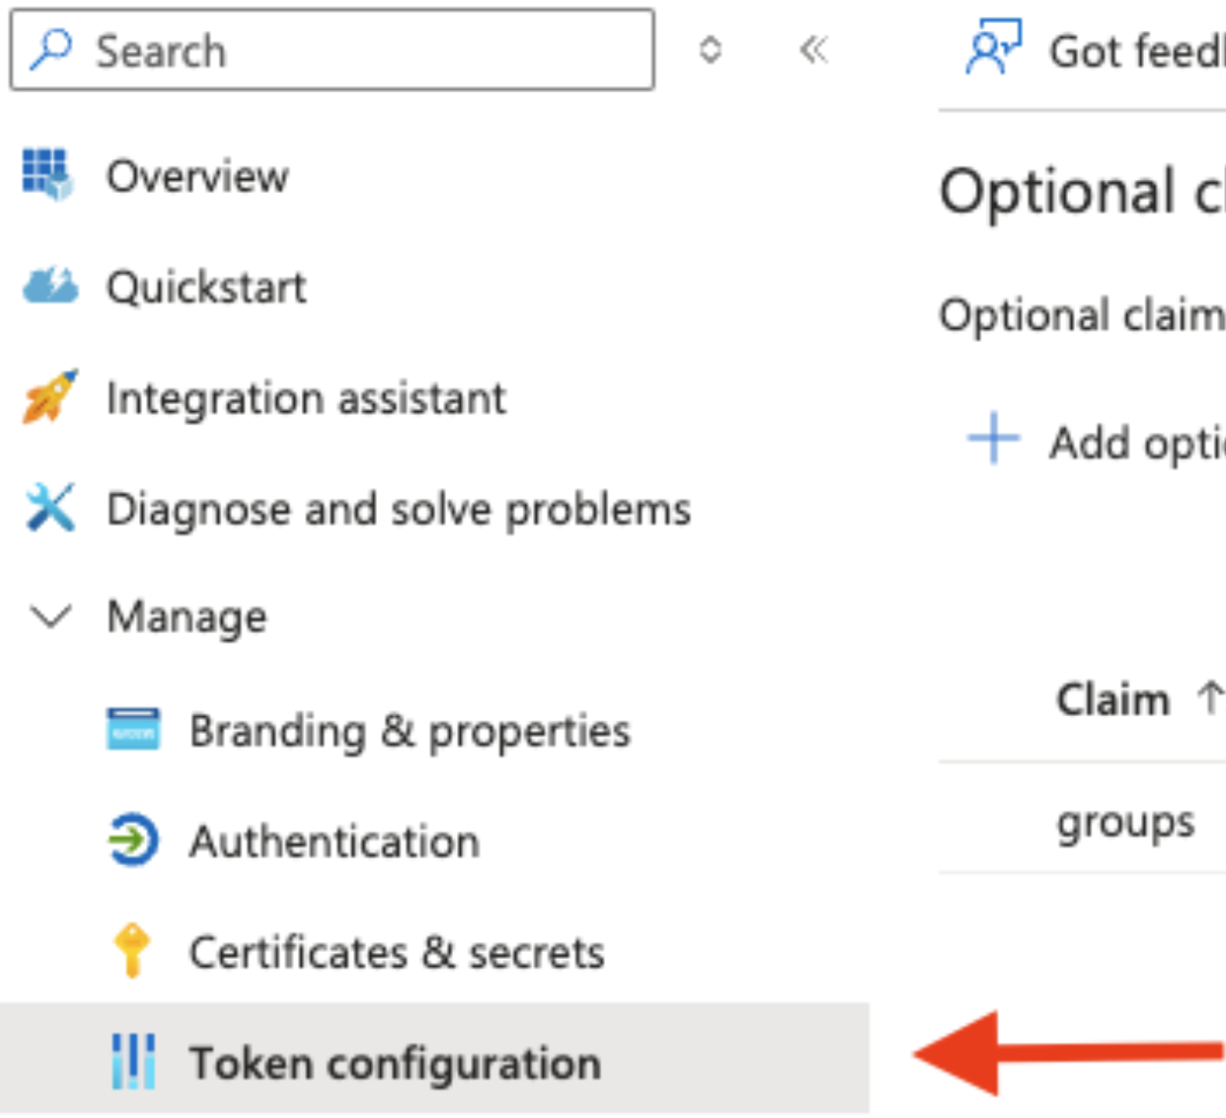 5. Click the **+ Add groups claim** button and select the types of groups you want to include in the claim.
6. Once you save the groups claim, click **API permissions**.
5. Click the **+ Add groups claim** button and select the types of groups you want to include in the claim.
6. Once you save the groups claim, click **API permissions**.
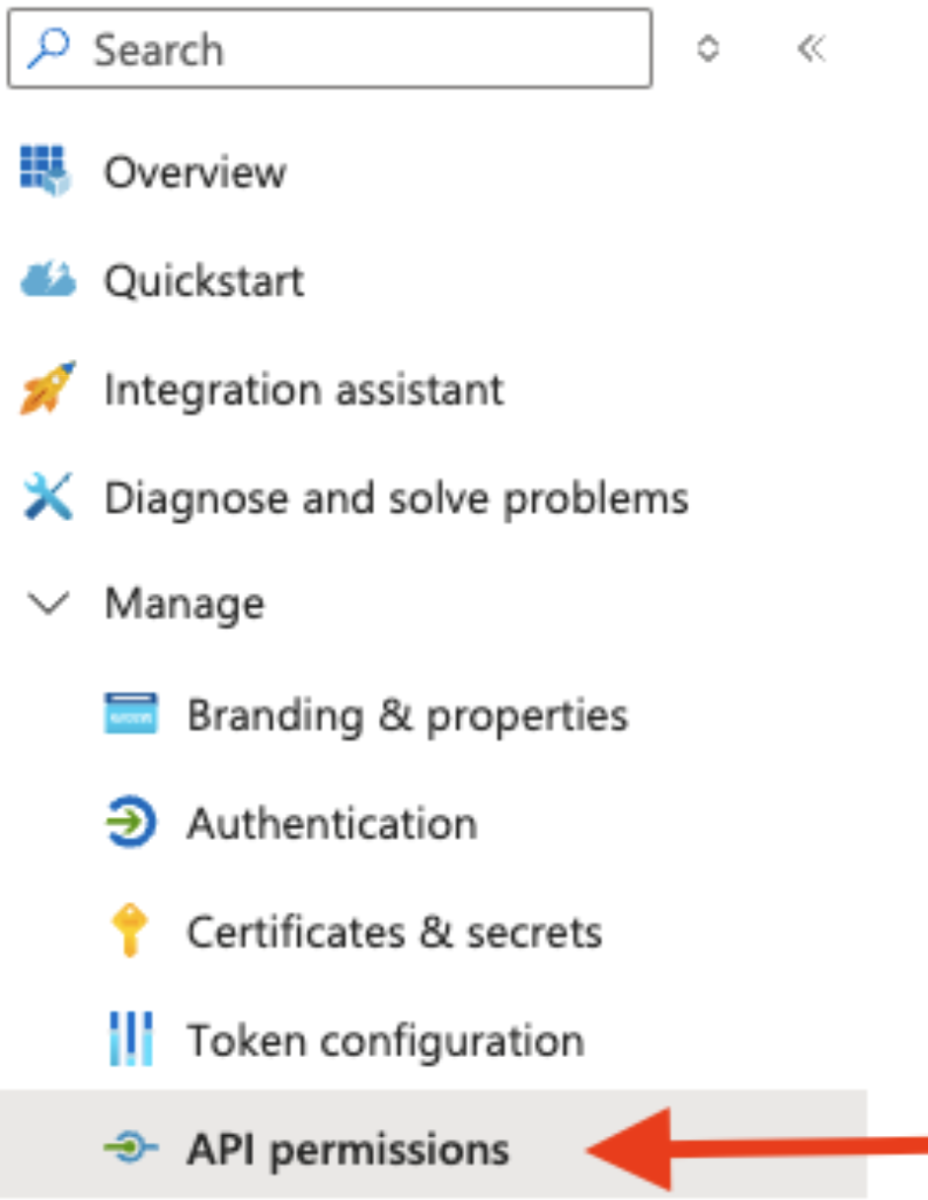 7. Click on **+ Add a permission.**
8. Select **Microsoft Graph** and then **Delegated permissions.**
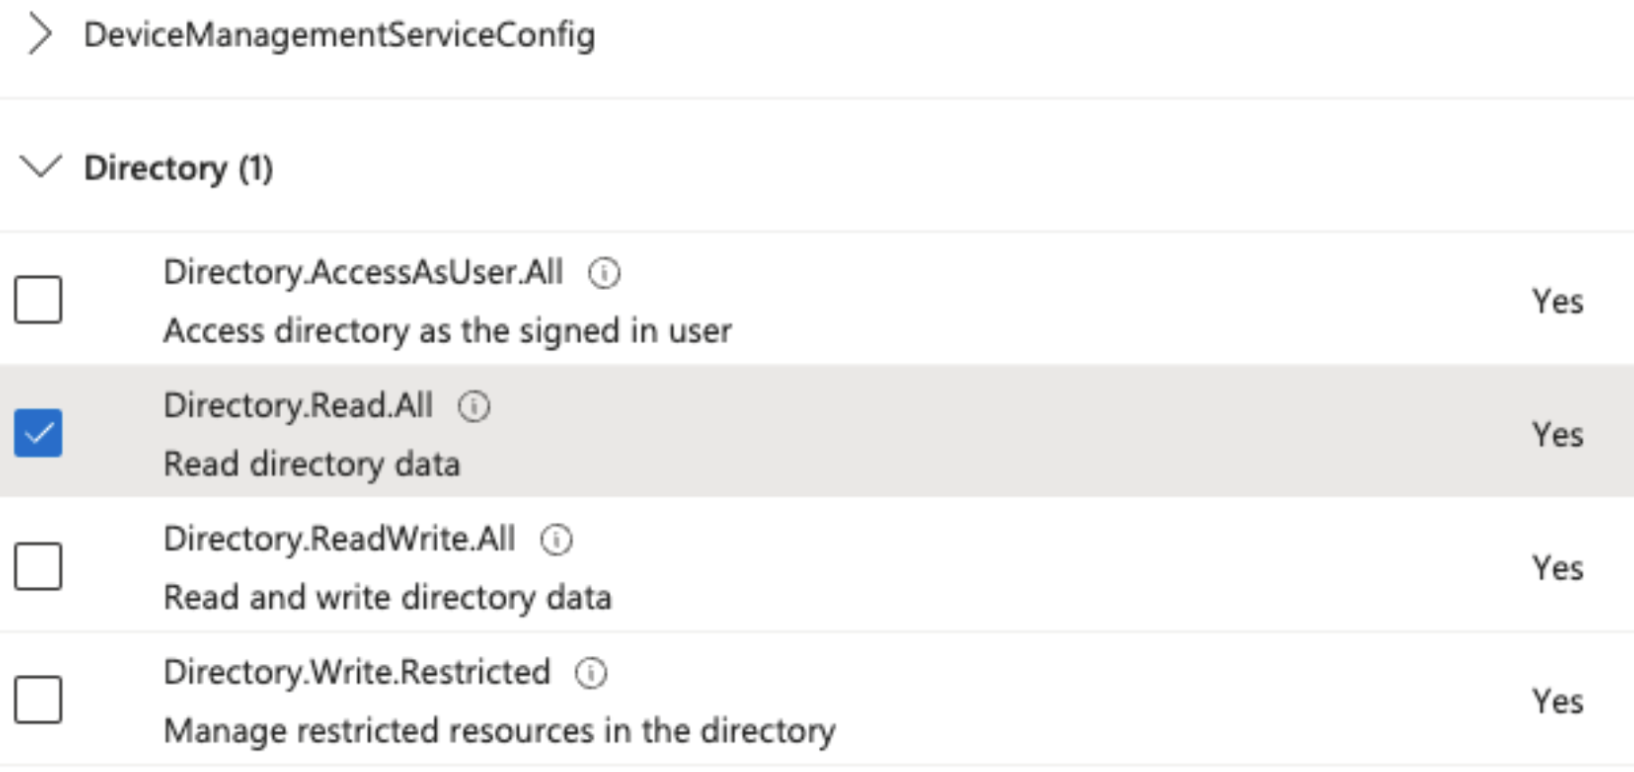
9. Scroll down to the **Directory** category, expand it, then check **Directory.Read.All**
7. Click on **+ Add a permission.**
8. Select **Microsoft Graph** and then **Delegated permissions.**
9. Scroll down to the **Directory** category, expand it, then check **Directory.Read.All**
 10. Click **Add permissions.**
11. When prompted, click **Yes** to grant admin consent.
### Granting User and Group Access to StarTree
1. Use the Azure portal search bar to search for **Enterprise applications.**
2. Select the application you created.
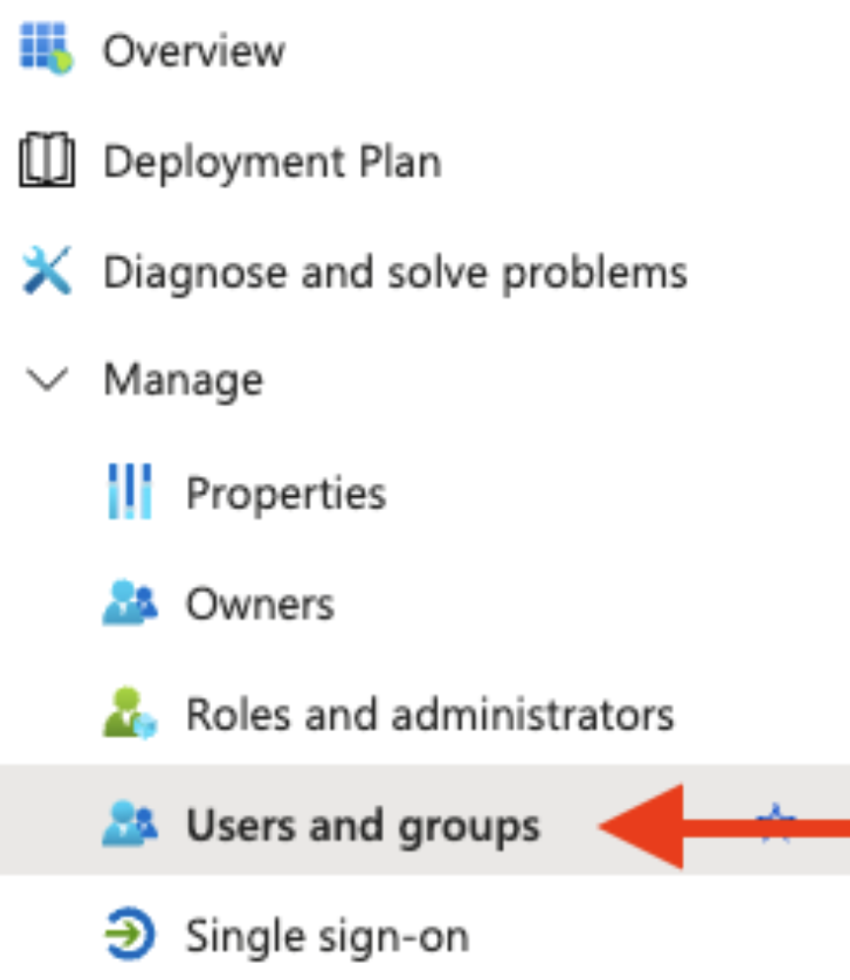
3. In the left navigation menu, expand the **Manage** menu and click on **Users and Groups.**
10. Click **Add permissions.**
11. When prompted, click **Yes** to grant admin consent.
### Granting User and Group Access to StarTree
1. Use the Azure portal search bar to search for **Enterprise applications.**
2. Select the application you created.
3. In the left navigation menu, expand the **Manage** menu and click on **Users and Groups.**
 4. Click **+ Add user/group** and add the users and groups that you want provide access to StarTree.
5. Click on **Assign.**
4. Click **+ Add user/group** and add the users and groups that you want provide access to StarTree.
5. Click on **Assign.**