> ## Documentation Index
> Fetch the complete documentation index at: https://docs.startree.ai/llms.txt
> Use this file to discover all available pages before exploring further.
> In this guide we'll learn how to import fields that have DateTime strings that contain timezones using StarTree Data Manager.
# Dealing with TimeZones
# Importing DateTimes that contain timezones
In this guide we'll learn how to import fields that have DateTime strings in various formats, including one with timezones.
We'll start with the following file, `events.json`, that contains JSON documents:
```json theme={null}
{"ts": "1659949952791", "ts1": "Mon 08 Aug 2022 10:12:32 +0100", "ts2": "2022-08-08 10:12:32", "ts3": "1659949952", "ts4": "2022-08-08T10:12:32.795Z"}
{"ts": "1659949952797", "ts1": "Mon 08 Aug 2022 10:12:32 +0100", "ts2": "2022-08-08 10:12:32", "ts3": "1659949952", "ts4": "2022-08-08T10:12:32.802Z"}
{"ts": "1659949952805", "ts1": "Mon 08 Aug 2022 10:12:32 +0100", "ts2": "2022-08-08 10:12:32", "ts3": "1659949952", "ts4": "2022-08-08T10:12:32.809Z"}
```
*events.json*
This file contains timestamps in different formats:
* `ts` - epoch milliseconds.
* `ts1` - DateTime string of the format `EEE dd MMM YYYY HH:mm:ss Z`.
* `ts2` - DateTime string of the format `YYYY-MM-dd HH:mm:ss`.
* `ts3` - epoch seconds.
* `ts4` - DateTime string of the ISO DateTime format (`yyyy-MM-dd'T'HH:mm:ss.SSS'Z'`)
Upload that file following the instructions in the [upload file](/corecapabilities/ingestdata/upload-file) guide.
Once you've selected the file and clicked through to the next screen, you'll see the following:
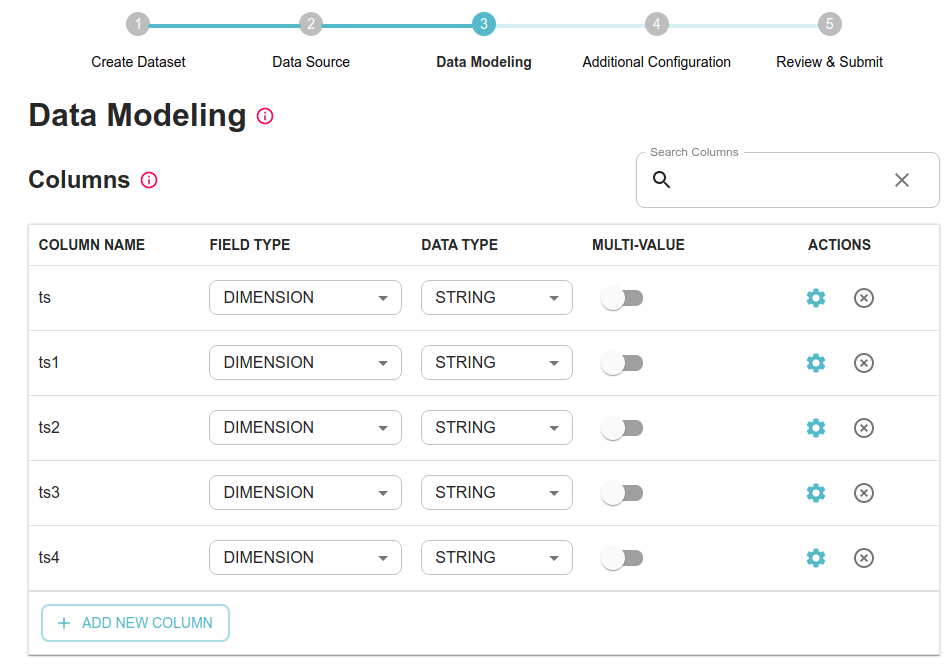 Let's change the field type for each column to `DATETIME`:
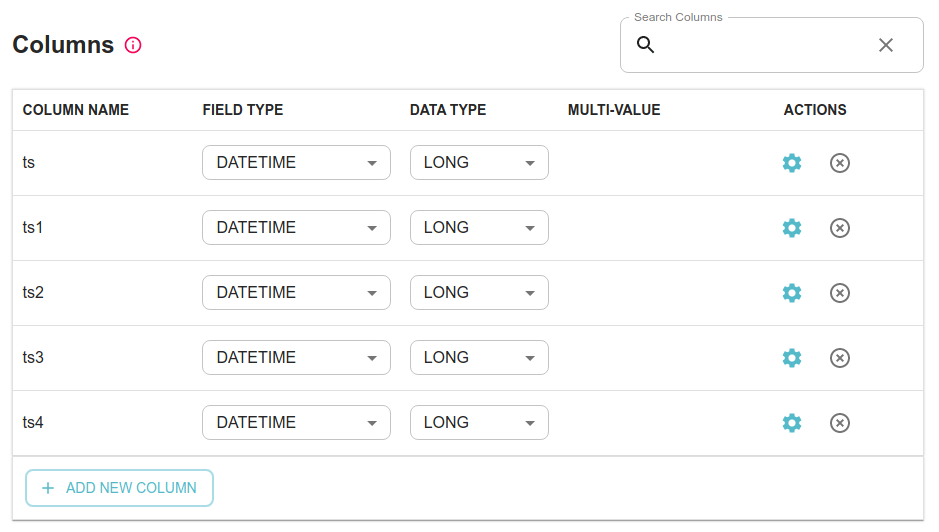 The `ts` column is already in the right format, but we'll need to apply transformation functions to the `ts1`, `ts2`, and `ts3` columns.
If you click on the cog icon next to each row, you'll see a modal window like this:
The `ts` column is already in the right format, but we'll need to apply transformation functions to the `ts1`, `ts2`, and `ts3` columns.
If you click on the cog icon next to each row, you'll see a modal window like this:
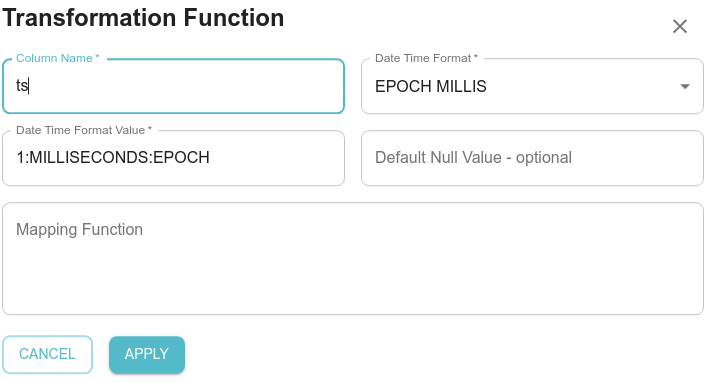 *Use 1:MICROSECONDS:EPOCH in case of the data is stored in seconds instead of millis*
We'll need to change the column name (you can't use the same field name when applying a transformation function) and paste the transformation function into `Mapping Function` based on the table below:
| Current column name | New column name | Transformation function |
| ------------------- | --------------- | ------------------------------------------------------------------------------------------ |
| ts1 | timestamp1 |
*Use 1:MICROSECONDS:EPOCH in case of the data is stored in seconds instead of millis*
We'll need to change the column name (you can't use the same field name when applying a transformation function) and paste the transformation function into `Mapping Function` based on the table below:
| Current column name | New column name | Transformation function |
| ------------------- | --------------- | ------------------------------------------------------------------------------------------ |
| ts1 | timestamp1 | FromDateTime(ts1, 'EEE dd MMM YYYY HH:mm:ss Z')
|
| ts2 | timestamp2 | FromDateTime(ts2, 'YYYY-MM-dd HH:mm:ss')
|
| ts3 | timestamp3 | "ts3" \* 1000
|
*Transformation functions to apply*
After you've updated each column, click **Apply** to apply your changes.
For the field `ts4` we need to change Date Time Format to `ISO DATETIME`.
Making this change will change the field type to `STRING`.
### Using native DateTime formats in Pinot
The above section is helpful when you want to transform incoming time formats into Milliseconds Epoch which is generally more performant. Alternatively, you could also use Pinot's built in DateTime format support as follows:
| Current column name | DateTime Format |
| ------------------- | ------------------------------------------------------------------------------------------- |
| ts2 | SIMPLE\_DATE\_FORMAT\|yyyy-MM-dd HH:mm:ss
|
| ts3 | EPOCH\|SECONDS\|1
|
| ts4 | SIMPLE\_DATE\_FORMAT\|yyyy-MM-dd'T'HH:mm:ss.SSSZ
|
**`Note: ts1 - DateTime string of the format EEE dd MMM YYYY HH:mm:ss Z is not natively supported in Pinot. This is because there is no way to sort this string on lexicographical and datetime order`**
Here's how the corresponding Pinot schema would look like:
    ```javascript theme={null}
    {
      ...
        "dateTimeFieldSpecs": [
          {
            "name": "ts2",
            "dataType": "STRING",
            "notNull": false,
            "format": "SIMPLE_DATE_FORMAT|yyyy-MM-dd HH:mm:ss",
            "granularity": "MILLISECONDS|1"
          },
          {
            "name": "ts4",
            "dataType": "STRING",
            "notNull": false,
            "format": "SIMPLE_DATE_FORMAT|yyyy-MM-dd'T'HH:mm:ss.SSSZ",
            "granularity": "MILLISECONDS|1"
          },
          {
            "name": "ts3",
            "dataType": "LONG",
            "notNull": false,
            "format": "EPOCH|SECONDS|1",
            "granularity": "SECONDS|1"
          },
          {
            "name": "ts",
            "dataType": "LONG",
            "notNull": false,
            "format": "EPOCH|MILLISECONDS|1",
            "granularity": "MILLISECONDS|1"
          }
        ]
    ...
    }
    ```
Here are some other commonly used examples:
| Sample | DateTime Format |
| ----------------------------- | -------------------------------------------------------------------------------------------- |
| 2025-04-01T14:31:16.551-05:00 | SIMPLE\_DATE\_FORMAT\|yyyy-MM-dd'T'HH:mm:ss.SSSZZ
|
For a full list of supported DateTime formats in Pinot please refer to [this link](https://docs.pinot.apache.org/configuration-reference/schema#new-datetime-formats).
Now click on **Pinot Data** and you should see the following:
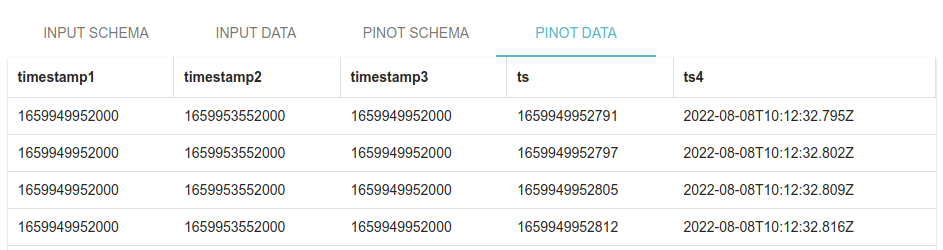 Before you click through to the next screen, make sure that the Pinot Time Column is set to `ts`.
 You can now click through the rest of the steps to add this dataset.
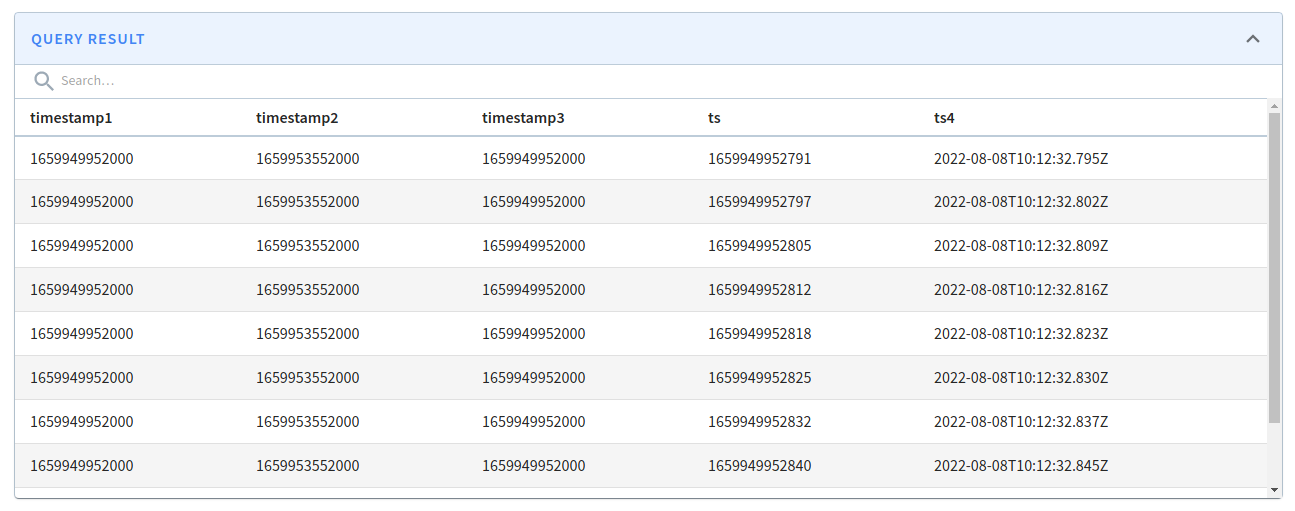
If you click on **query console** from the final screen and then select this table, you'll see the results of a query that gets the first 10 rows:
You can now click through the rest of the steps to add this dataset.
If you click on **query console** from the final screen and then select this table, you'll see the results of a query that gets the first 10 rows: